Finance guide contents
For the finance team that approves vendor bills, tracks meal costs, and looks after the subscription. Most of the work is most comfortable on a laptop.
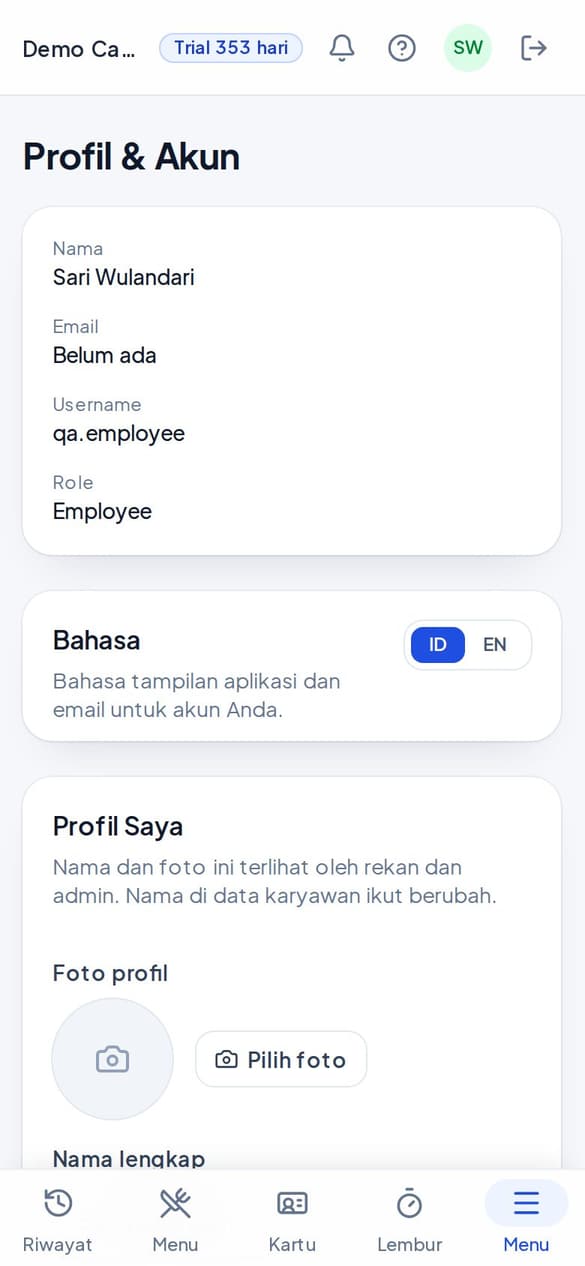
The screenshots show the app in Indonesian. In the app, open Profile & Account and choose EN to switch the language.
What you can do
- Check and approve vendor bills against the claim data
- Set department budgets and track their usage
- Decide corrections and disputes on claims
- Review anomalies, savings, and the audit log
- Manage the subscription and its payments
Outside this role
- Change the original claim history (it is only corrected, never deleted)
- Approve a correction you submitted yourself (a second person is needed)
- Manage employees, departments, or menus
- Set meal times and canteens (an Admin task)
- 1Get started: sign in and install
Sign in, install on your phone, turn on notifications, and set up your account. - 2Dashboard and reports
Today's cost, this month's vendor bill, and reports you can download. - 3Vendor bills
Bills are compared automatically with the meal claims recorded in the system. - 4Department budgets and savings
Control meal cost per department and see what Canteenku gives you. - 5Corrections, anomalies, and audit
Keeping the claim data honest. - 6Subscription and the employee wallet
Pay for a plan, and set up the wallet if the company uses it. - 7Frequently asked questions
Short answers to the most common problems.
Get started: sign in and install
Sign in, install on your phone, turn on notifications, and set up your account.
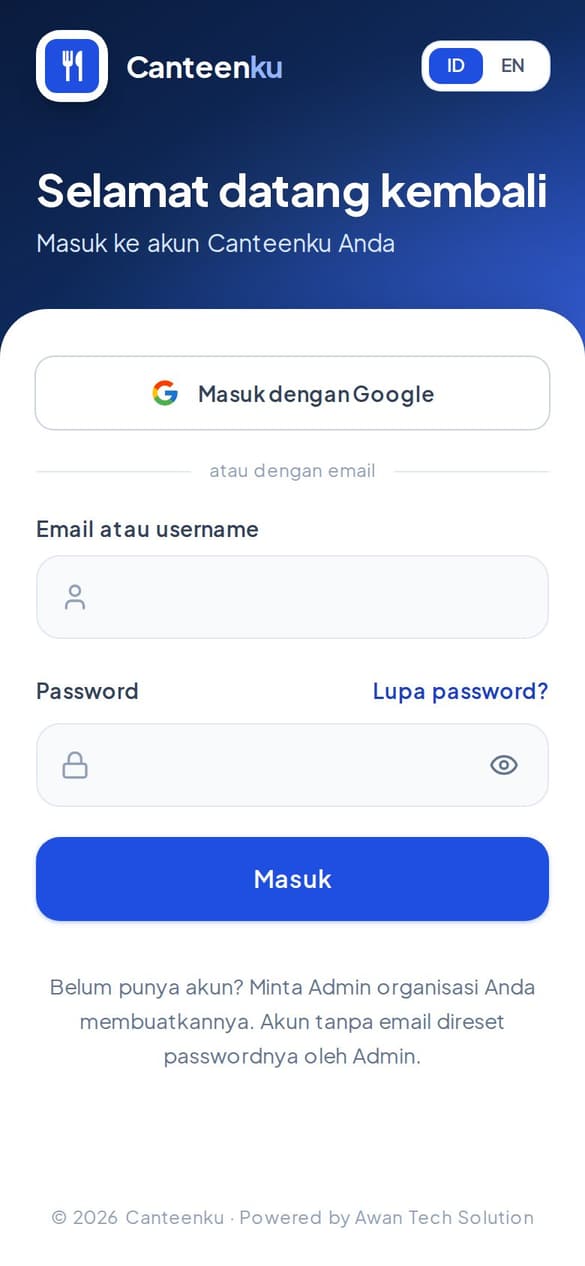
1Sign in to Canteenku
Your account is created by the admin or HR of your organisation. You do not need to register yourself.
- Open canteenku.cloud in Safari or Chrome, or open the Canteenku app if it is already installed.
- Enter the Email or username and Password your admin gave you, then tap Sign in.
- If your account uses a Google email, tap Sign in with Google.
- After signing in, you land on the home page for your role.
Forgot your password? Tap Forgot password? on the sign-in page, enter your email, and follow the button in the email. Accounts without an email: ask your admin to reset the password.
After your first sign-in, change your password in Profile & Account so only you know it.
2Install it on your phone
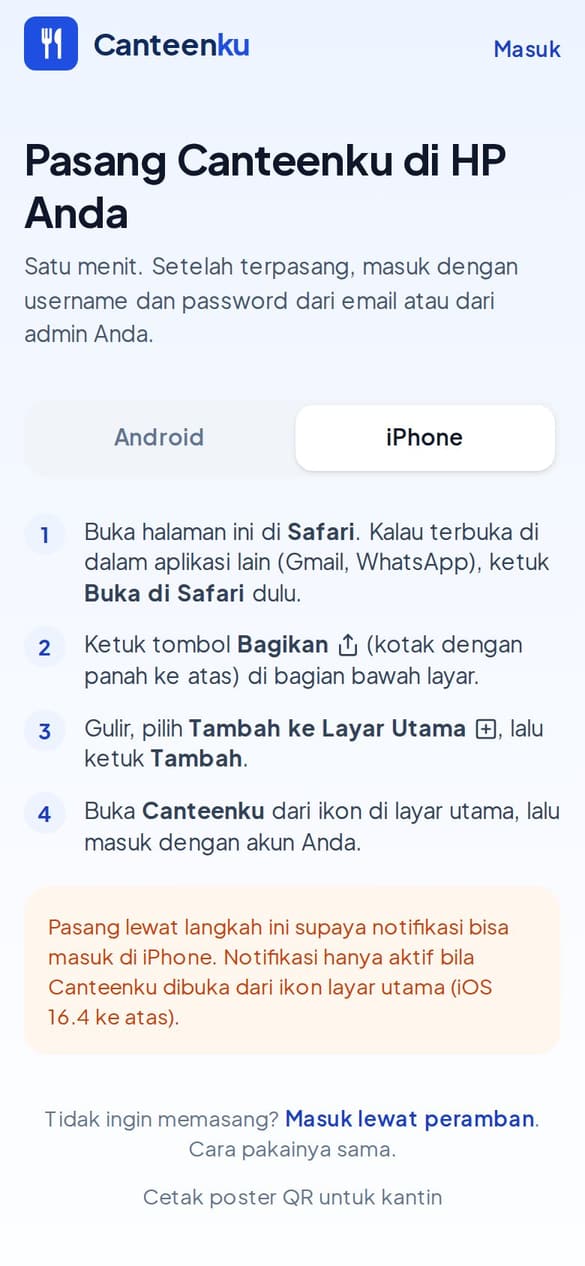
Canteenku works in a browser, but it is more convenient installed like an app. Choose your phone.
- Android: open canteenku.cloud/unduh, tap the download button, open the Canteenku.apk file from the notification or the Files app, allow install from this source if asked, then tap Install.
- iPhone: open canteenku.cloud in Safari, tap the Share button (a box with an arrow pointing up) at the bottom of the screen, choose Add to Home Screen, then tap Add.
- Open Canteenku from the icon on your home screen and sign in with your account.
On iPhone, notifications only work when Canteenku is opened from the icon on the home screen (iOS 16.4 or later), not from regular Safari.
3Turn on notifications
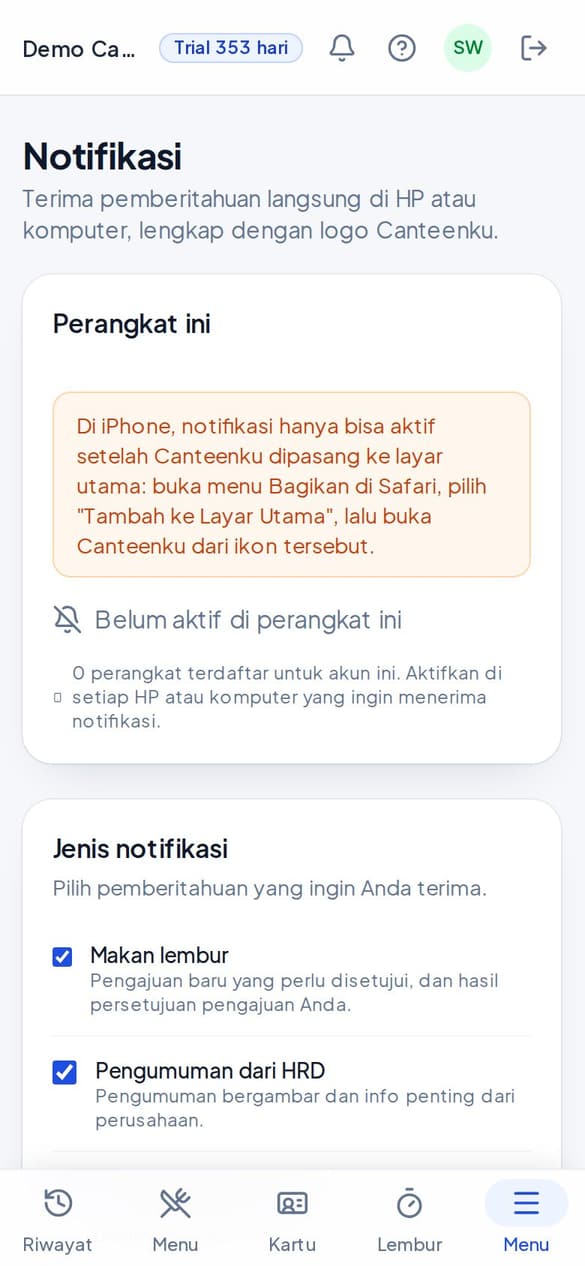
Notifications tell you what matters right on your phone or computer, with the Canteenku logo.
- Open Notifications (from the main menu or the bell icon).
- Under This device, tap Turn on notifications, then choose Allow when your phone asks.
- Under Notification type, tick the notifications you want to receive.
Turn this on for every phone or computer you use. The setting applies per device.
4Profile, password, and language
It is all in the Profile & Account menu.
- Open Profile & Account from the main menu.
- Language: choose ID (Indonesian) or EN (English) for the app and email.
- Profile photo: tap Choose photo. Colleagues and admins can see your photo.
- Change password: tap Change password, enter a new password, then save.
- Two-step verification (2FA): turn it on for extra protection. Some organisations require it for certain roles.
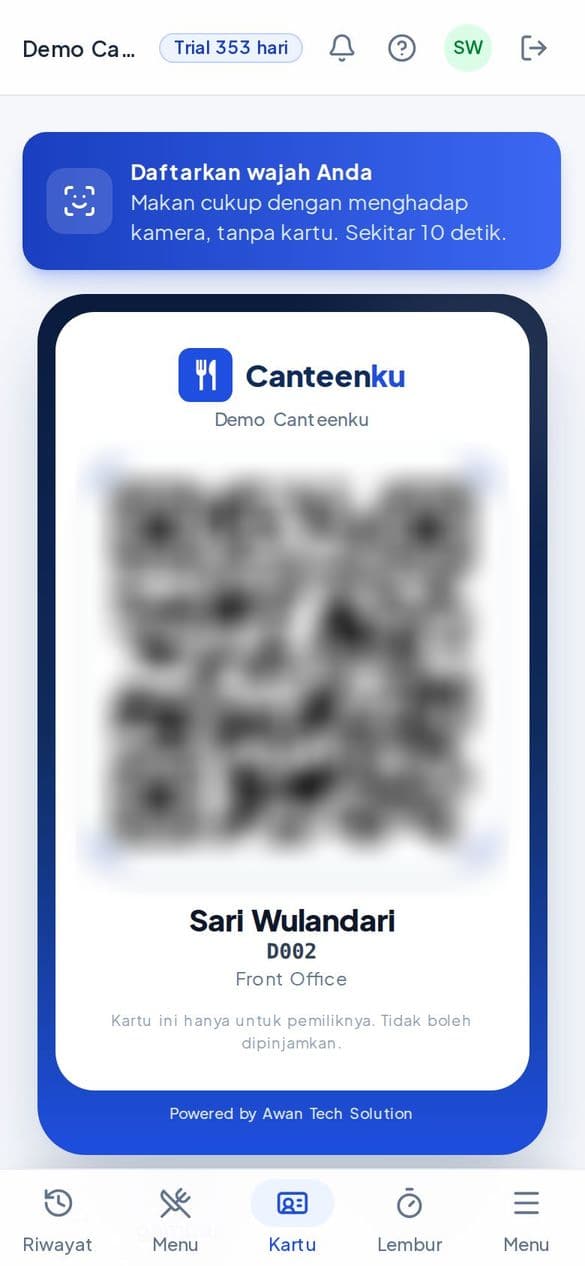
Never share your password or QR card. Every claim is recorded in the account owner's name.
Dashboard and reports
Today's cost, this month's vendor bill, and reports you can download.
1Reading the dashboard
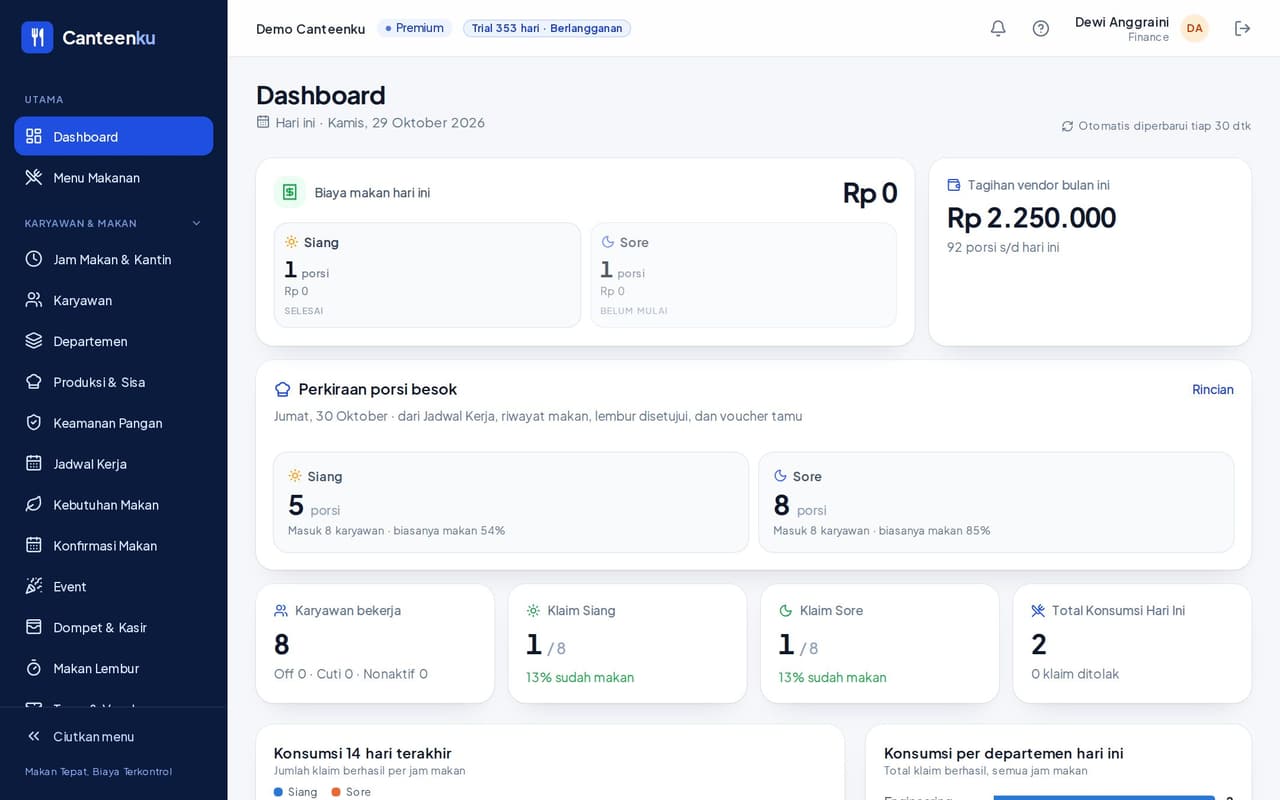
- Meal cost today is broken down by meal time (portions and rupiah), with the meal time's status: in progress, finished, or not yet.
- Vendor bill this month shows the estimated bill and the number of portions up to today. If there is a minimum portion count, the number of billed portions is explained beneath it.
- Tomorrow's portion forecast shows portions per meal time, based on the duty roster, meal history, overtime, and guest vouchers.
- The Employees working, Lunch claims, Dinner claims, and Total Consumption Today cards show who has already eaten. A 14-day chart and the Latest claims are below.
- The page refreshes itself every 30 seconds.
2Reports
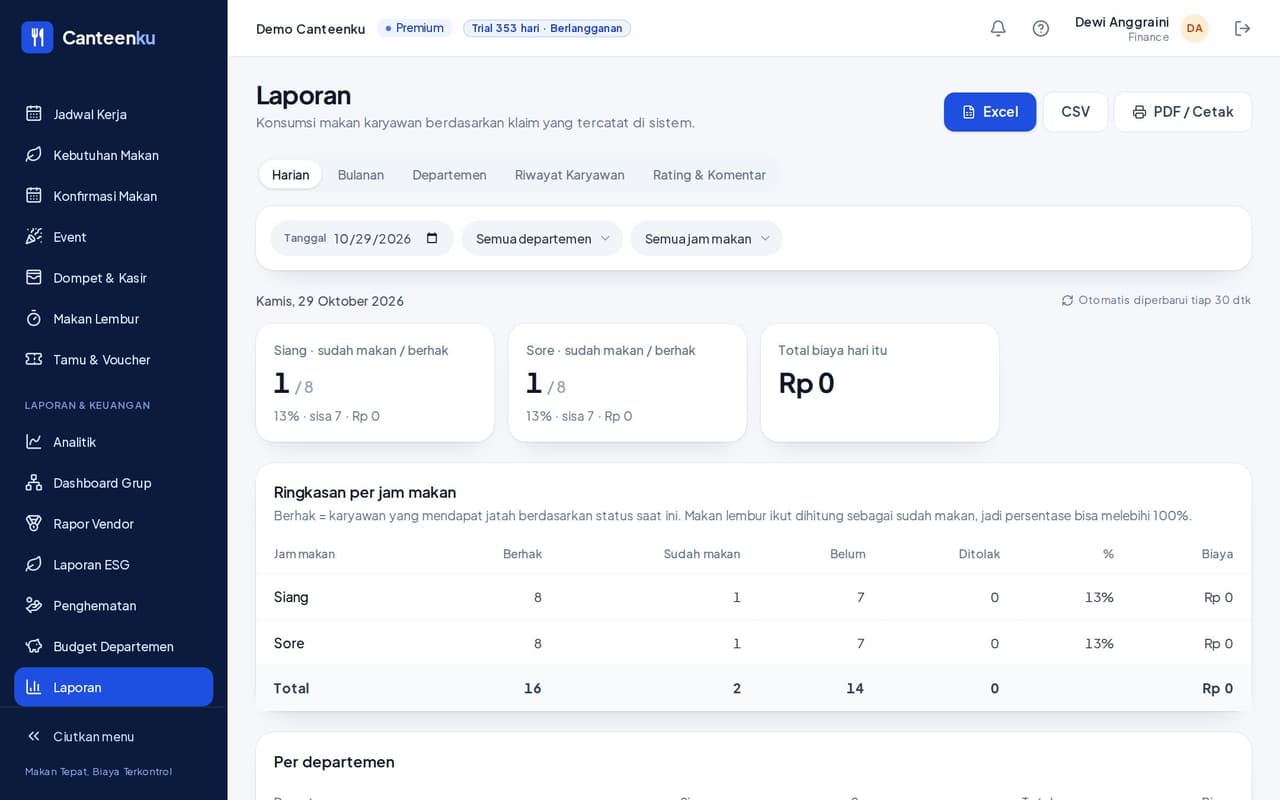
- Open Reports. Choose the Daily, Monthly, Department, Employee History, or Ratings & Comments tab.
- Set the Date, All departments, and All meal times.
- Read the Summary per meal time and the table below it, then download with Excel, CSV, or PDF / Print.
3Analytics, the Group Dashboard, and the ESG Report
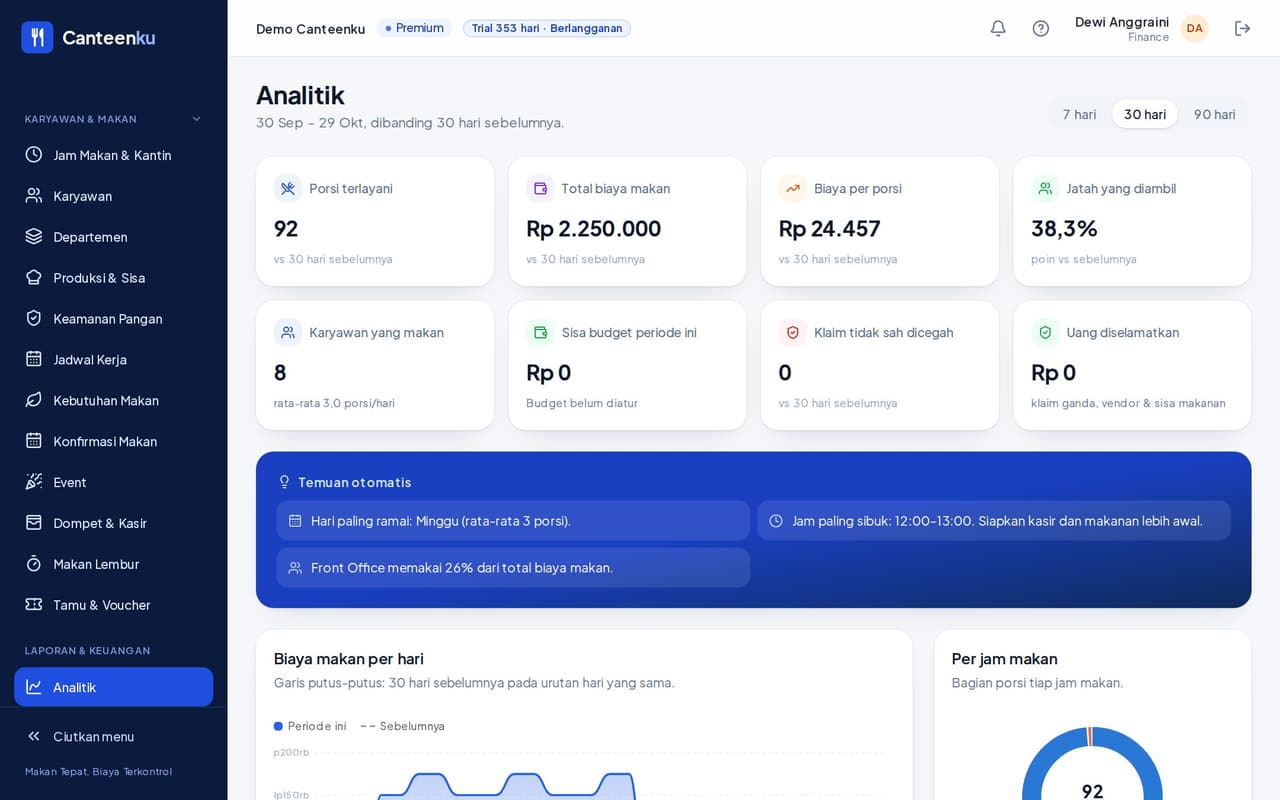
- Analytics: portions, total cost, cost per portion, allowances not taken, and Automatic findings (the busiest day and hour). Choose 7, 30, or 90 days.
- Group Dashboard: compares cost, portions, ratings, and HACCP across locations. It is useful when the organisation has more than one location.
- ESG Report: a summary of food waste and its impact.
Vendor bills
Bills are compared automatically with the meal claims recorded in the system.
1How reconciliation works
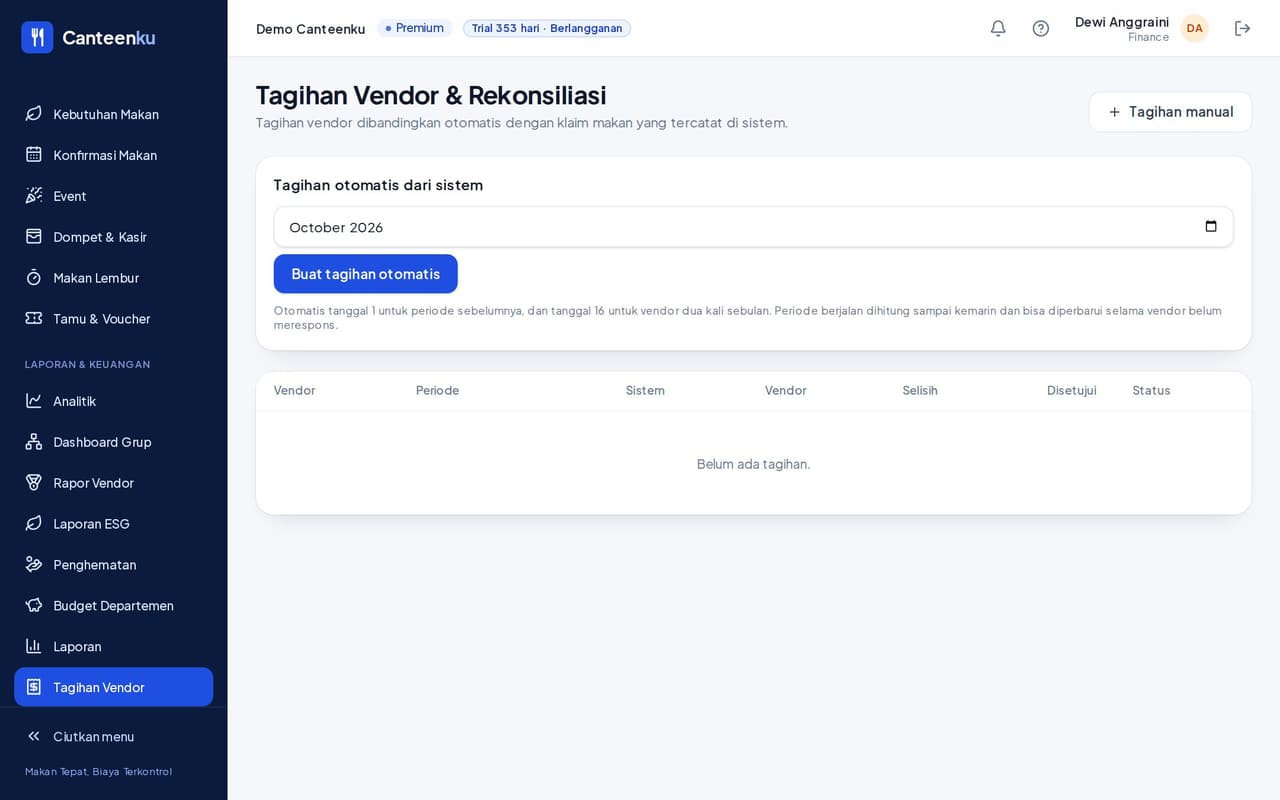
Open Vendor Bills (Vendor Bills & Reconciliation). The portion count comes from the scans at the canteen (employees and guests) multiplied by the agreed price per portion.
- Automatic bill from the system: created on the 1st for the previous period, and on the 16th for vendors billed twice a month. You can also choose a month and click Create automatic bill. The current period is calculated up to yesterday and can be refreshed while the vendor has not responded.
- Manual bill: click Manual bill to fill it in yourself (or let the vendor fill it in).
- Open a bill to see the portions, price, and cost for each day. It can be printed or saved as a PDF.
2Deciding on a bill
- Approve per system data: use the figures from the recorded claims.
- Approve per vendor bill: use the figures the vendor submitted.
- Dispute / refuse: fill in the Note / reason (required).
- Return to the vendor for revision: the bill goes back to draft and the vendor can change the counts.
Once the vendor has submitted, the counts cannot be changed unless Finance returns the bill.
Expenses and extra services are billed separately from portions and are not part of the tax deduction.
3Vendors and their scorecard
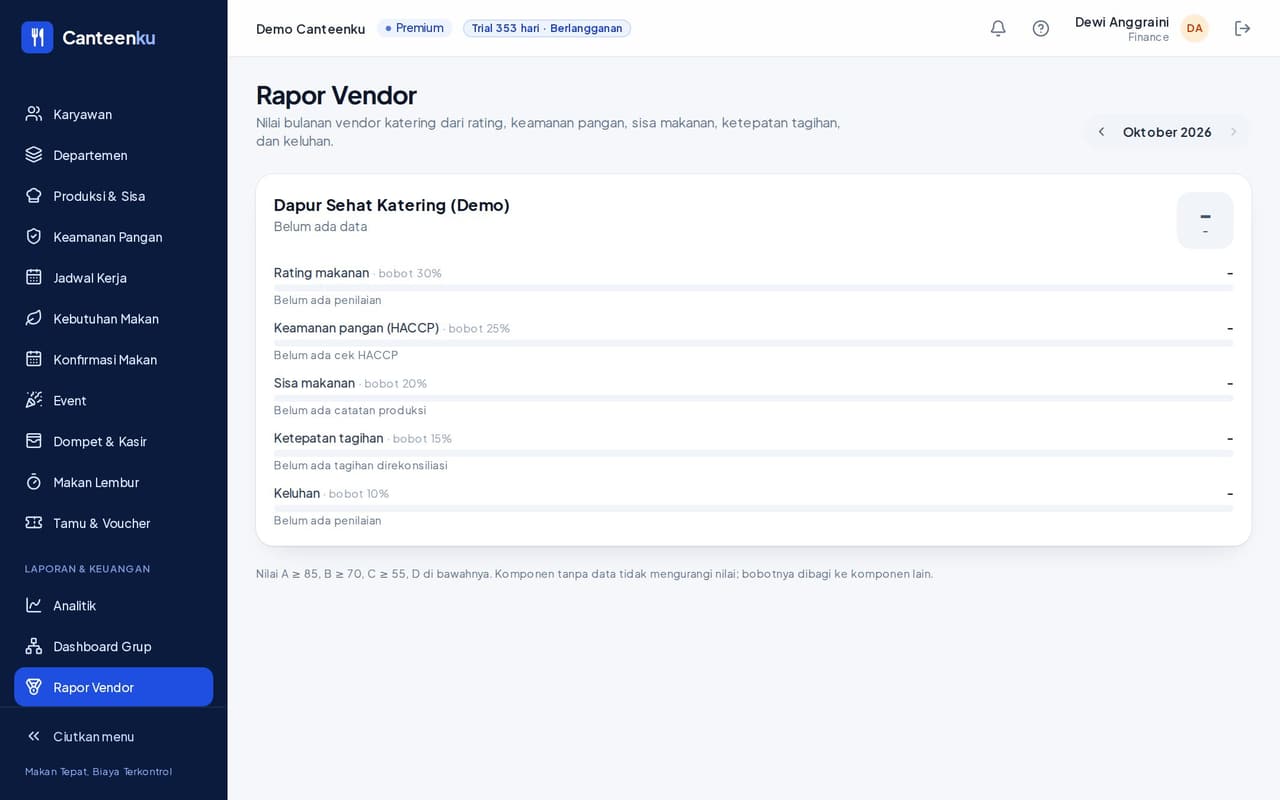
Vendors lists the vendors who serve employee meals, their contacts, the canteens they serve, and their status. Vendor Scorecard gives a monthly score from food ratings, food safety, food waste, billing accuracy, and complaints.
Department budgets and savings
Control meal cost per department and see what Canteenku gives you.
1Setting budgets
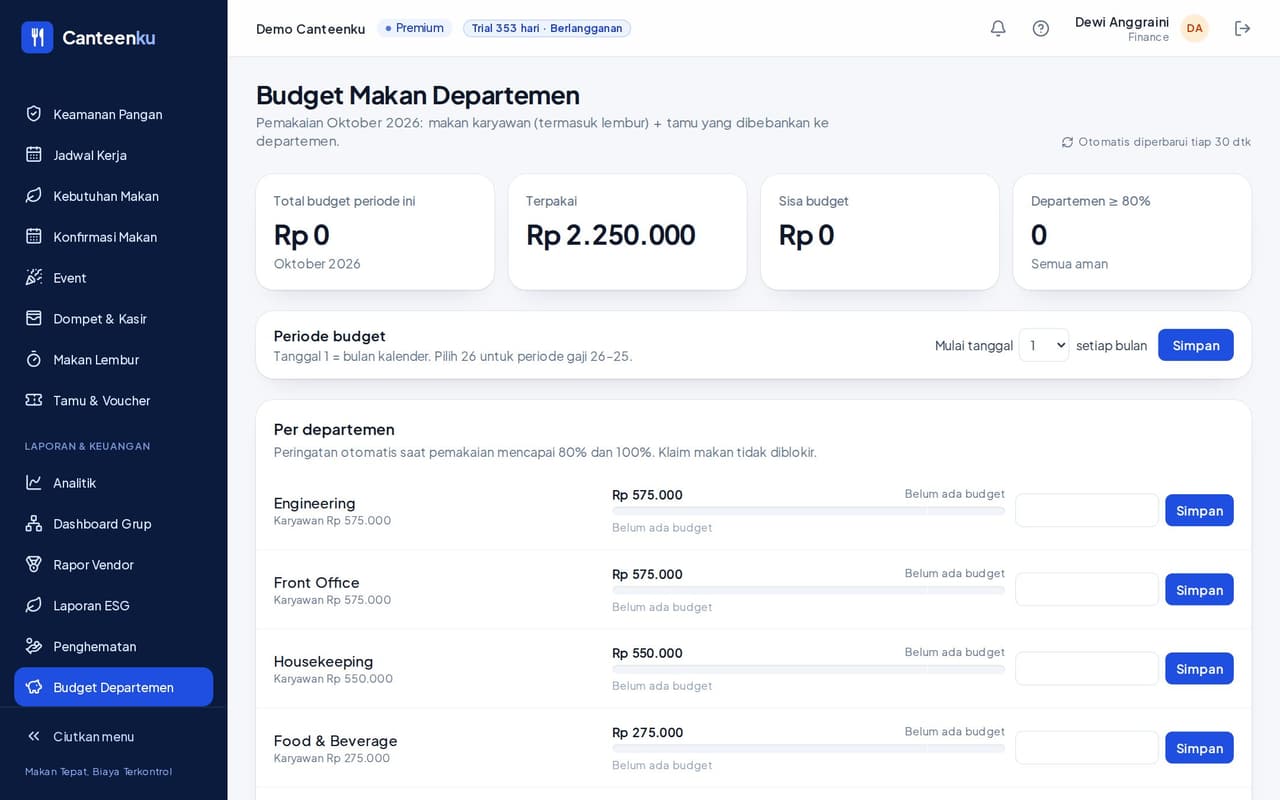
- Open Department Budgets. The top cards show the total budget for this period, used, remaining budget, and the number of departments above 80%.
- Under Budget period, choose the start date: 1 means a calendar month, 26 means a payroll period of the 26th to the 25th. Click Save.
- Under Per department, fill in each department's budget, then click Save on its row.
The system sends an automatic reminder when usage reaches 80% and 100%. Meals are not blocked: only the warning is configured.
2Savings
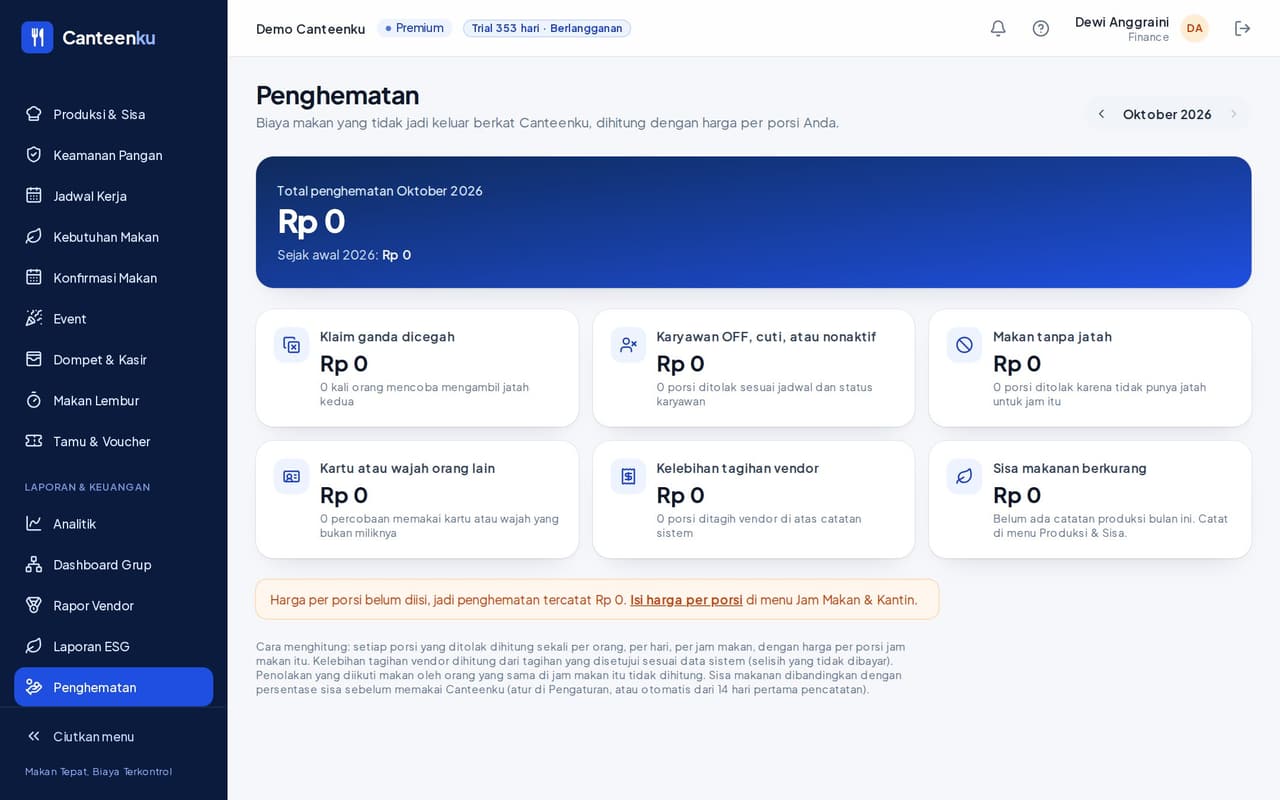
Savings shows the cost you did not have to pay thanks to Canteenku, calculated with your organisation's price per portion: double claims prevented, employees who are Off, on leave, or inactive, meals without an allowance, someone else's card or face, vendor overbilling, and reduced food waste.
If the price per portion has not been filled in, savings show Rp 0. Fill in the price under Meal Times & Canteens (an Admin task).
Corrections, anomalies, and audit
Keeping the claim data honest.
1Corrections & Disputes
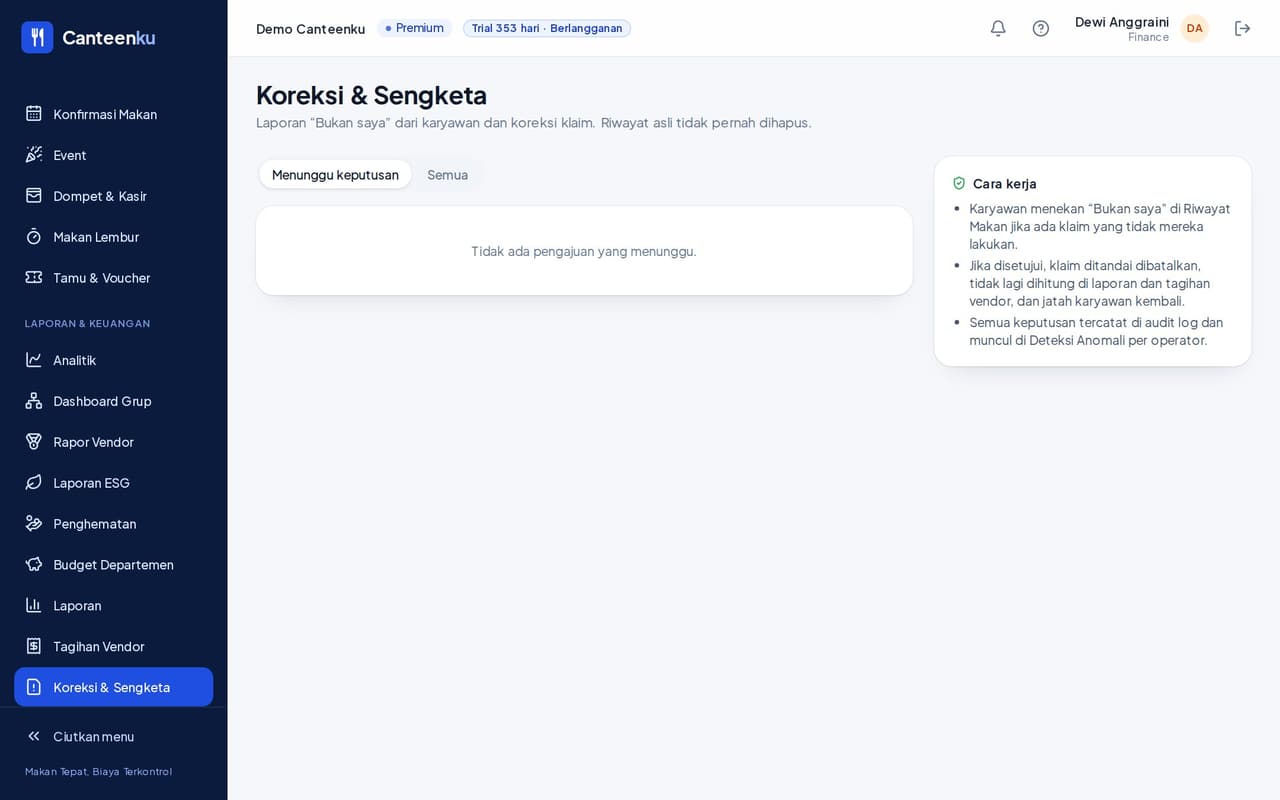
Employees tap Not me in Meal History when there is a claim they did not make. The original history is never deleted.
- Open Corrections & Disputes. The Awaiting decision tab holds reports that need you.
- Check the employee's note, then approve or refuse.
- If approved, the claim is marked voided, no longer counted in reports and vendor bills, and the employee's allowance is returned.
- For Submit a correction (a cancellation or a missed claim), the two-person principle applies: the person who submitted it cannot approve it themselves; another Admin or Finance user must. This feature is available on the Premium plan.
Every decision is recorded in the audit log and appears in Anomaly Detection per operator.
2Anomaly Detection
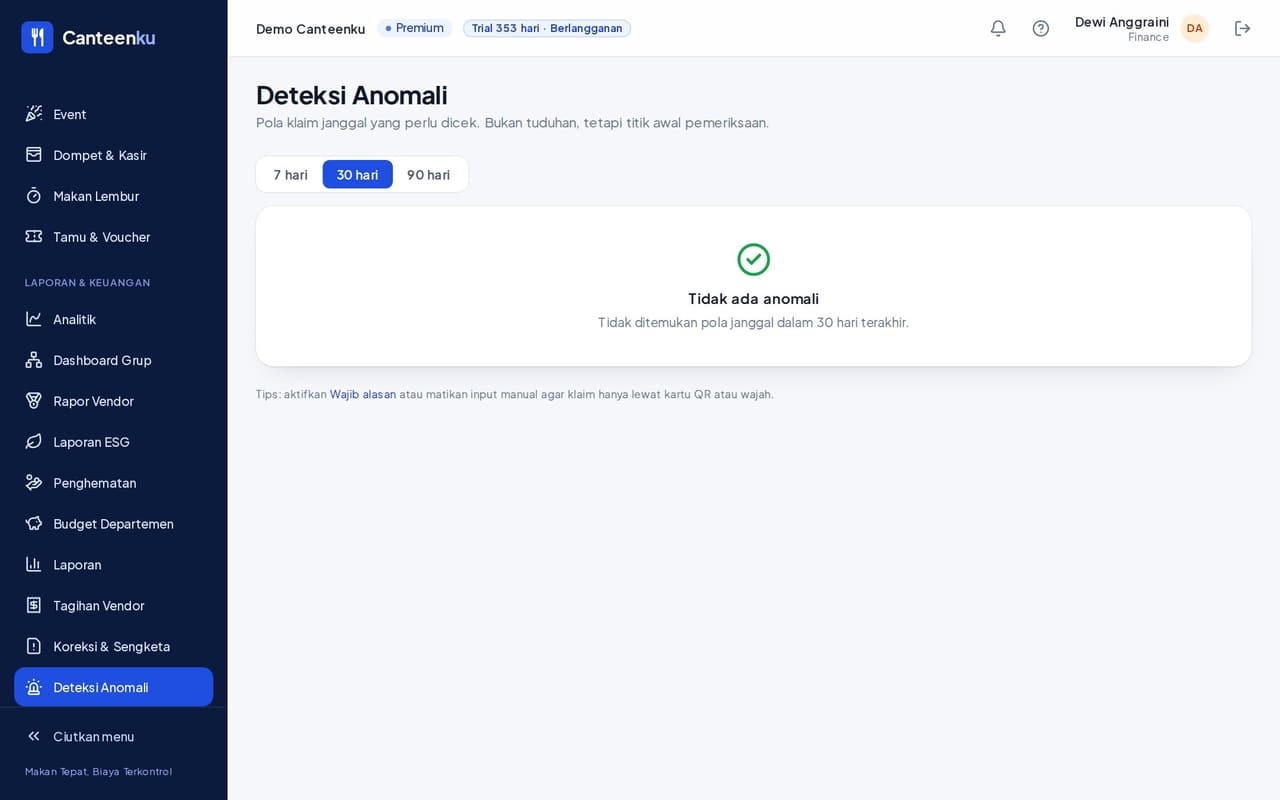
Available on the Pro and Premium plans. The system automatically flags unusual claim patterns: excessive manual entry, back-to-back claims that are too quick, Not me reports, and attempts with someone else's face.
- Open Anomaly Detection and choose a range of 7, 30, or 90 days.
- Check each finding. It is not an accusation, only a starting point for review.
- If there is a lot of manual entry, consider turning it off so claims only go through a QR card or a face.
3Audit Log
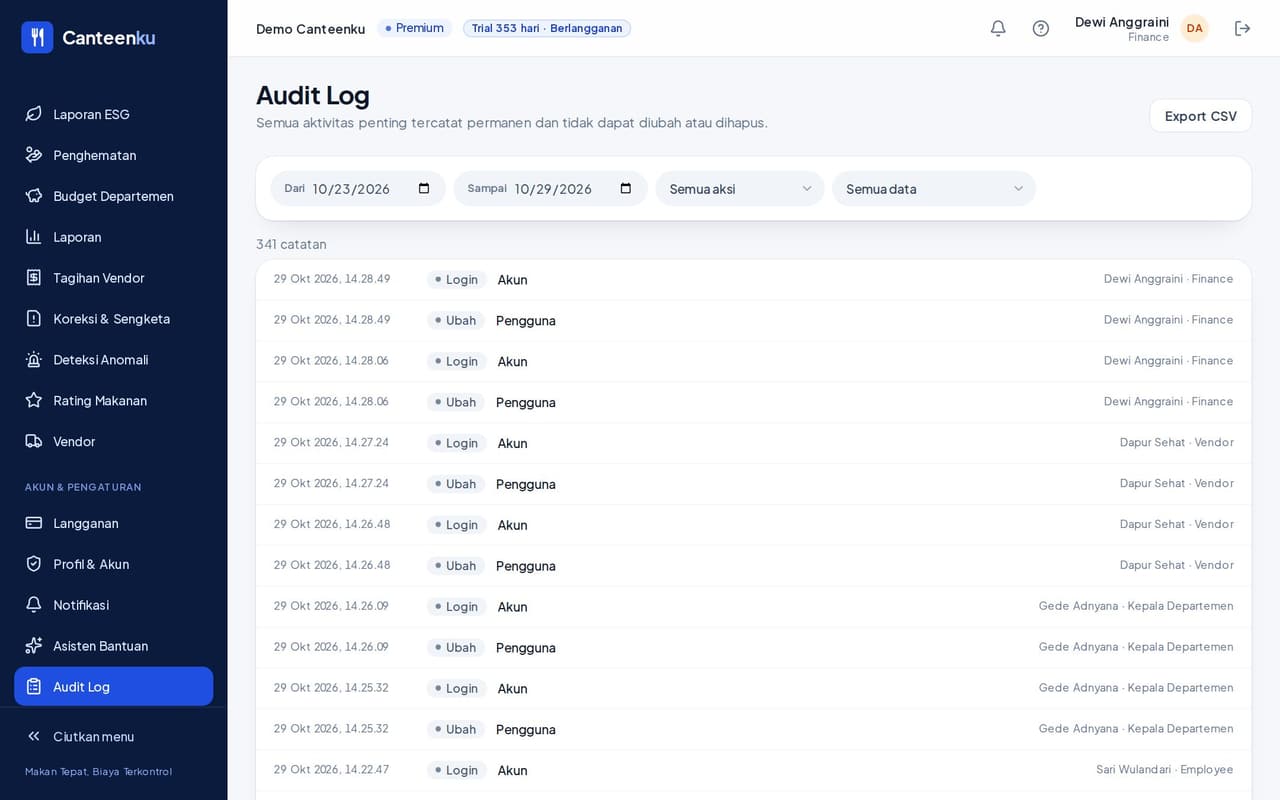
All important activity is recorded permanently and cannot be changed or deleted. Filter by date, action, and data, then download with Export CSV.
Subscription and the employee wallet
Pay for a plan, and set up the wallet if the company uses it.
1Paying for or changing a plan
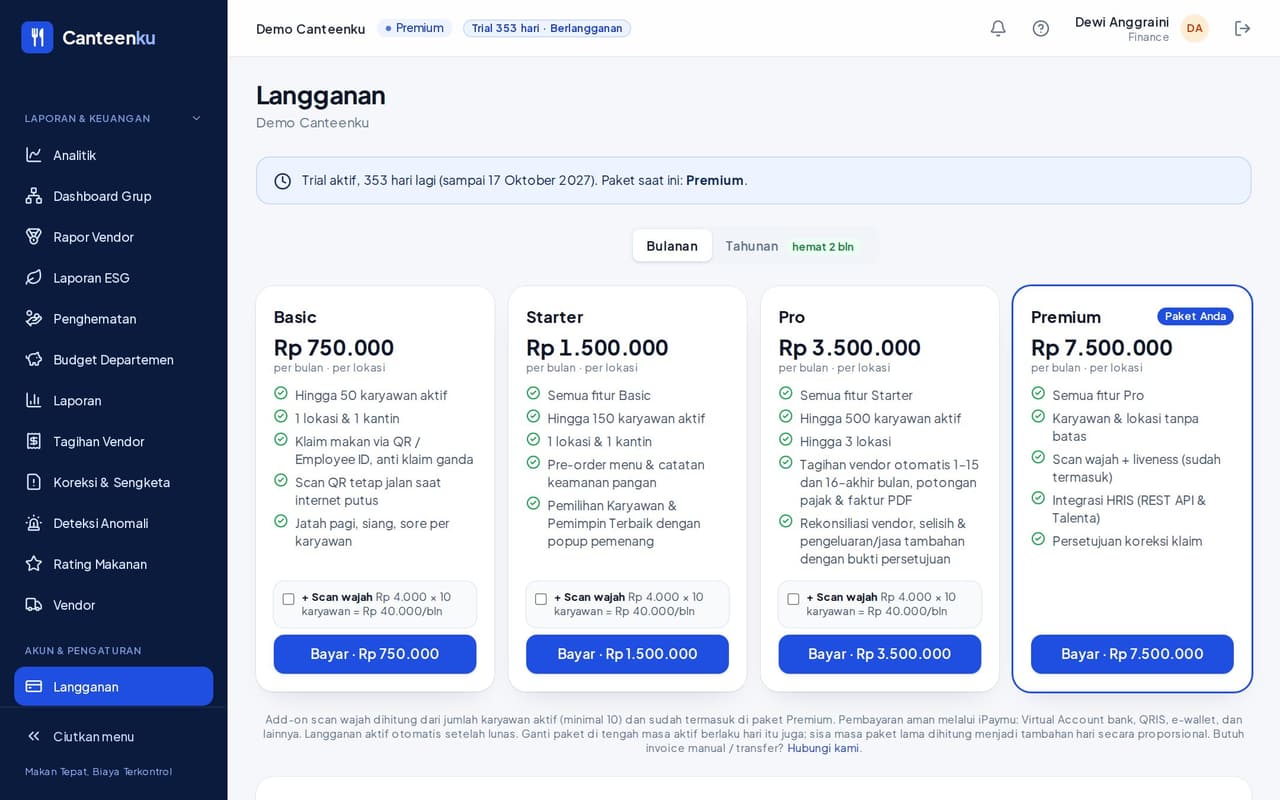
- Open Subscription at canteenku.cloud in a browser. Payment is not made through the Android app.
- Choose Monthly or Yearly, then the plan (Basic, Starter, Pro, or Premium). Your current plan is marked.
- Click Pay. Payment goes through iPaymu: bank Virtual Account, QRIS, e-wallets, and more.
- Once paid, the subscription activates automatically. If you change plan in the middle of a period, the new plan applies that day and the remaining time on the old plan is converted into extra days proportionally.
The face scan add-on is calculated from the number of active employees (minimum 10) and is already included in the Premium plan.
Need a manual invoice / bank transfer? Contact us using the details in the last chapter.
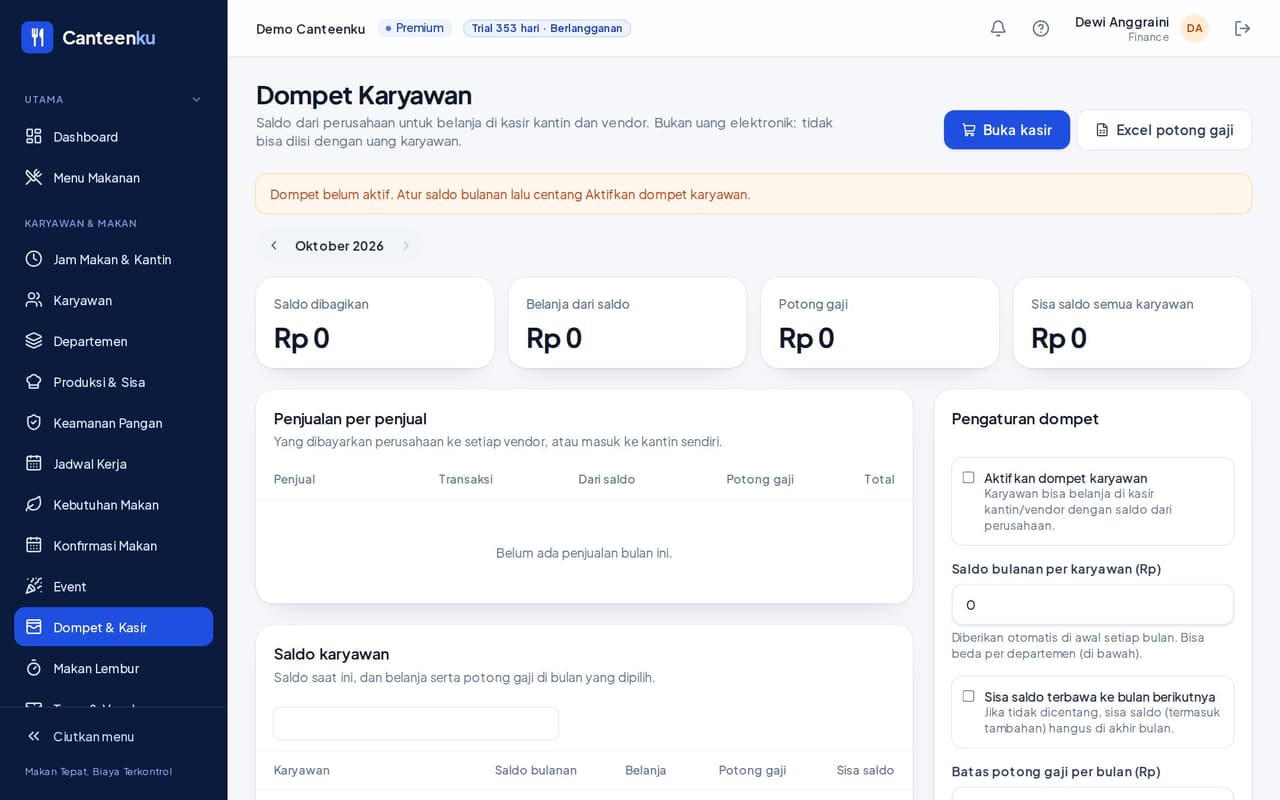
2The employee wallet
A monthly employee balance for shopping at the canteen till and vendors, without cash. It is not electronic money: the balance is topped up by the company.
- Open Wallet & Till, then turn on the employee wallet under Wallet settings.
- Fill in the Monthly balance per employee and the monthly payroll-deduction limit.
- Track Sales per seller. Use Payroll Excel for the payroll-deduction report, and Open till to sell.
Frequently asked questions
Short answers to the most common problems.
- The vendor bill figure differs from the vendor's figure.
- The system counts from the claims recorded at the canteen. Open the bill, look at the daily breakdown, and choose one: approve per system data, approve per vendor bill, or return it for revision with a note.
- Why does Vendor bill this month already have a value when there are no claims yet?
- Some hotels use a minimum portion per meal time. The minimum is counted from the organisation's first claim, and the dashboard writes the number beneath the bill figure.
- I do not see Anomaly Detection or correction approval.
- Some features depend on the plan: Anomaly Detection on Pro and Premium, two-person correction approval on Premium. Upgrade under Subscription.
- How do I cancel a wrong claim?
- The employee reports it with Not me, or an Admin or HR submits a correction. Finance decides under Corrections & Disputes. The original history stays.
- The subscription payment succeeded but the plan is not active.
- Wait a few minutes, then reload. The subscription activates automatically once the payment is confirmed. If it still is not active, contact us with the invoice number.
Still have questions?
Contact us on WhatsApp +62 857-0779-9569 or by email at awantechsolution.bali@gmail.com. Tell us your role and the name of the menu you opened.