Admin guide contents
For the person in charge of Canteenku in your organisation. The Admin holds almost every menu: settings, users, reports, and the subscription.
The screenshots show the app in Indonesian. In the app, open Profile & Account and choose EN to switch the language.
What you can do
- Set meal times, prices, canteens, departments, and locations
- Manage employees and user accounts with their roles
- Manage the menu, vendors, and food safety
- Track reports, vendor bills, corrections, and the audit log
- Set up the subscription, the payment gateway, and WhatsApp
Outside this role
- Approve a correction you submitted yourself (another Admin or Finance user is needed)
- Change your own main role or account status
- See other organisations' data
- Delete claim history (it is only corrected)
- 1Get started: sign in and install
Sign in, install on your phone, turn on notifications, and set up your account. - 2Setting up the organisation
First steps so the canteen is ready to use: meal times, departments, locations, and vendors. - 3Employees and user accounts
Who may eat, and who may sign in as what. - 4Menu, production, and food safety
Both the Admin and vendors can fill in the menu. - 5Claims at the canteen, guests, and overtime
Scanning, guest vouchers, and extra allowances. - 6Communication and employee engagement
Announcements, polls, surveys, and elections. - 7Reports and control
Costs, bills, corrections, and the audit trail. - 8Subscription, payments, and WhatsApp
The Canteenku plan, receiving payments, and notifications. - 9Frequently asked questions
Short answers to the most common problems.
Get started: sign in and install
Sign in, install on your phone, turn on notifications, and set up your account.
1Sign in to Canteenku
Your account is created by the admin or HR of your organisation. You do not need to register yourself.
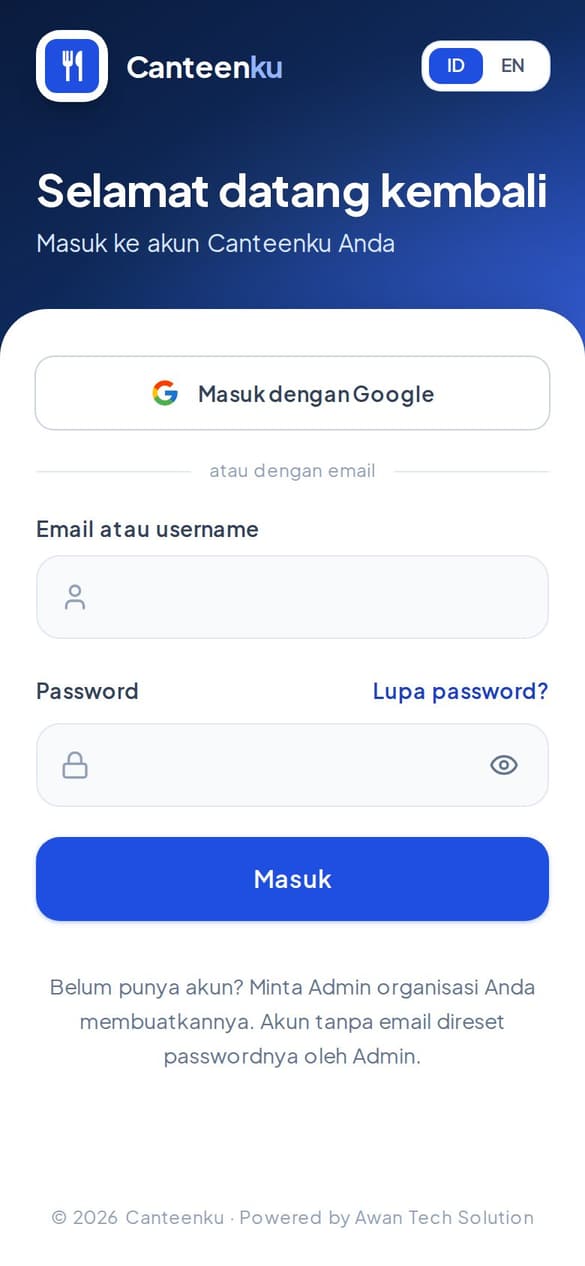
- Open canteenku.cloud in Safari or Chrome, or open the Canteenku app if it is already installed.
- Enter the Email or username and Password your admin gave you, then tap Sign in.
- If your account uses a Google email, tap Sign in with Google.
- After signing in, you land on the home page for your role.
Forgot your password? Tap Forgot password? on the sign-in page, enter your email, and follow the button in the email. Accounts without an email: ask your admin to reset the password.
After your first sign-in, change your password in Profile & Account so only you know it.
2Install it on your phone
Canteenku works in a browser, but it is more convenient installed like an app. Choose your phone.
- Android: open canteenku.cloud/unduh, tap the download button, open the Canteenku.apk file from the notification or the Files app, allow install from this source if asked, then tap Install.
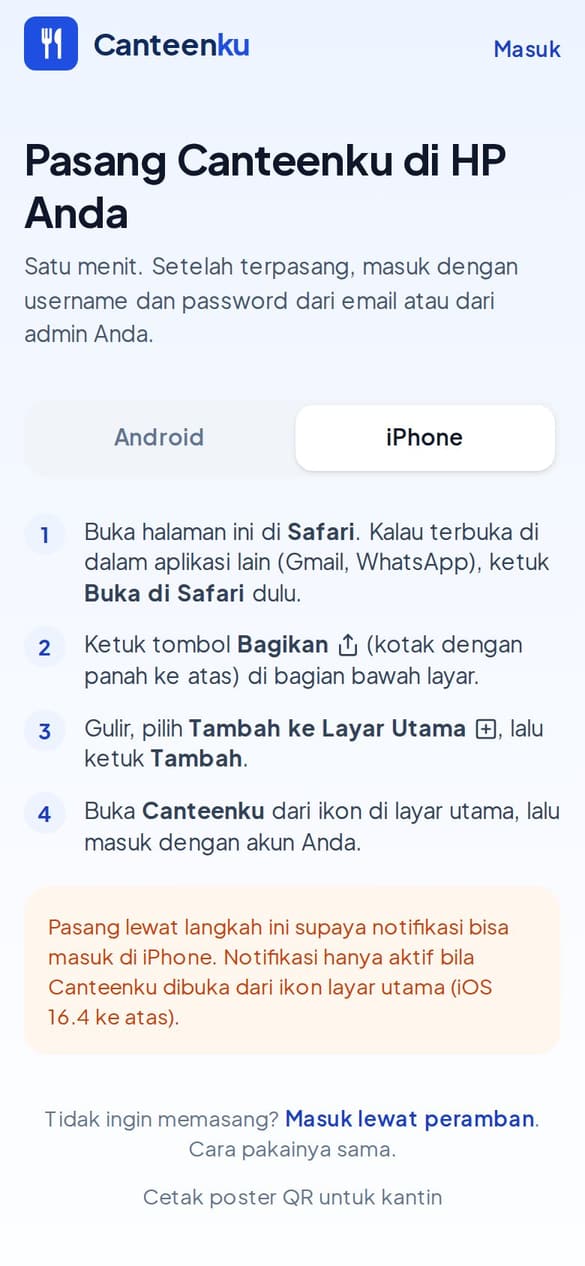
- iPhone: open canteenku.cloud in Safari, tap the Share button (a box with an arrow pointing up) at the bottom of the screen, choose Add to Home Screen, then tap Add.
- Open Canteenku from the icon on your home screen and sign in with your account.
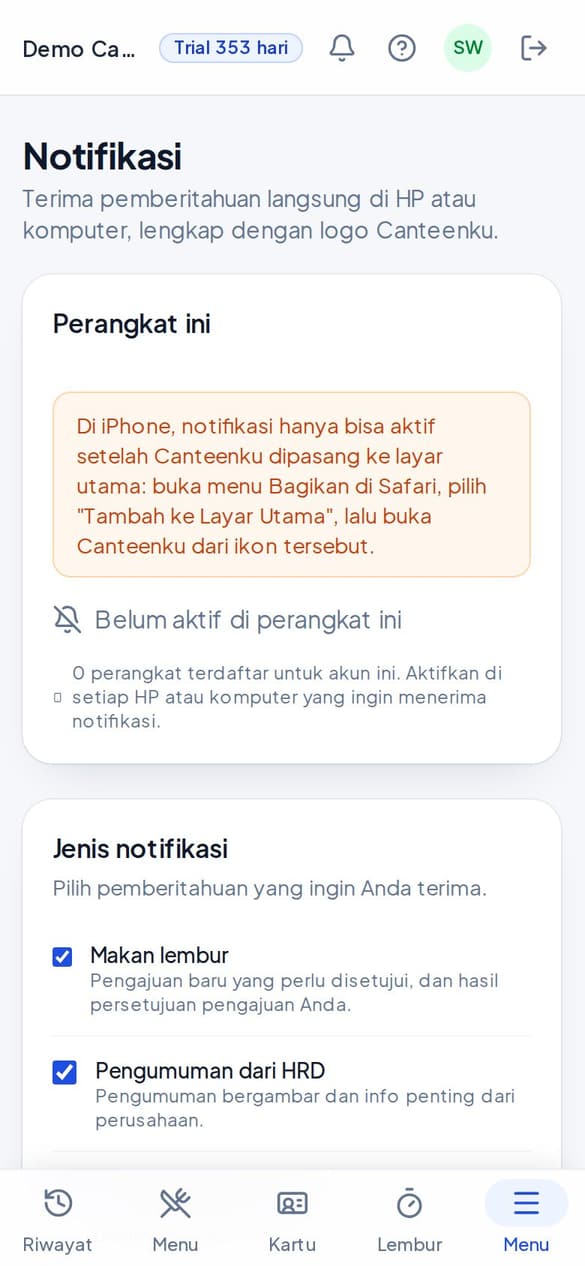
On iPhone, notifications only work when Canteenku is opened from the icon on the home screen (iOS 16.4 or later), not from regular Safari.
3Turn on notifications
Notifications tell you what matters right on your phone or computer, with the Canteenku logo.
- Open Notifications (from the main menu or the bell icon).
- Under This device, tap Turn on notifications, then choose Allow when your phone asks.
- Under Notification type, tick the notifications you want to receive.
Turn this on for every phone or computer you use. The setting applies per device.
4Profile, password, and language
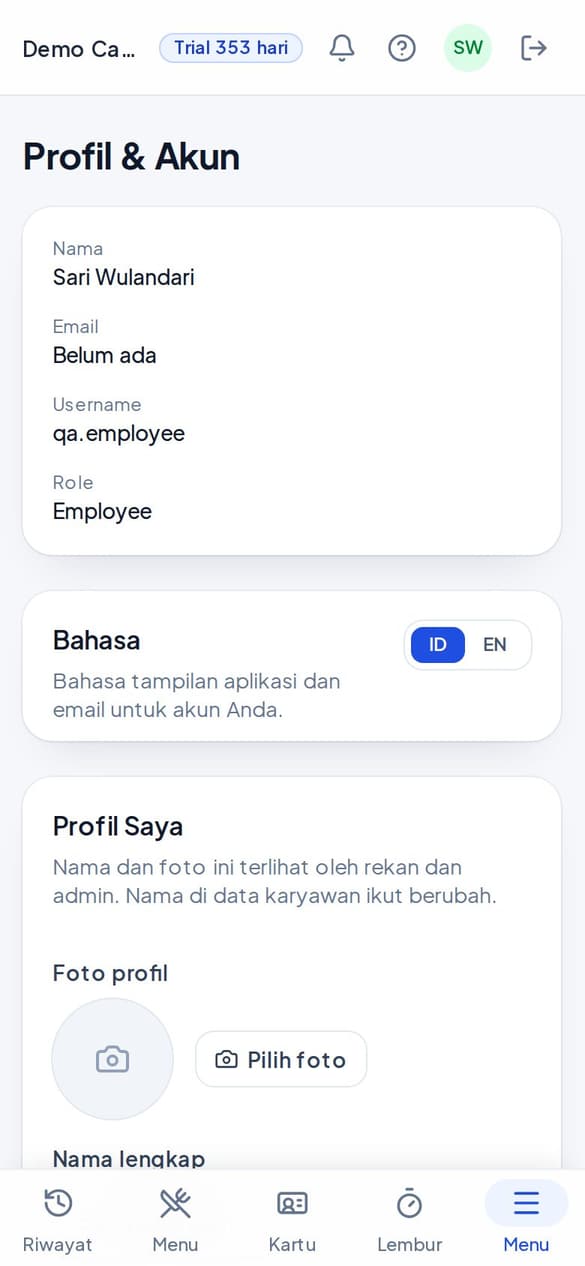
It is all in the Profile & Account menu.
- Open Profile & Account from the main menu.
- Language: choose ID (Indonesian) or EN (English) for the app and email.
- Profile photo: tap Choose photo. Colleagues and admins can see your photo.
- Change password: tap Change password, enter a new password, then save.
- Two-step verification (2FA): turn it on for extra protection. Some organisations require it for certain roles.
Never share your password or QR card. Every claim is recorded in the account owner's name.
Setting up the organisation
First steps so the canteen is ready to use: meal times, departments, locations, and vendors.
1Meal times and canteens
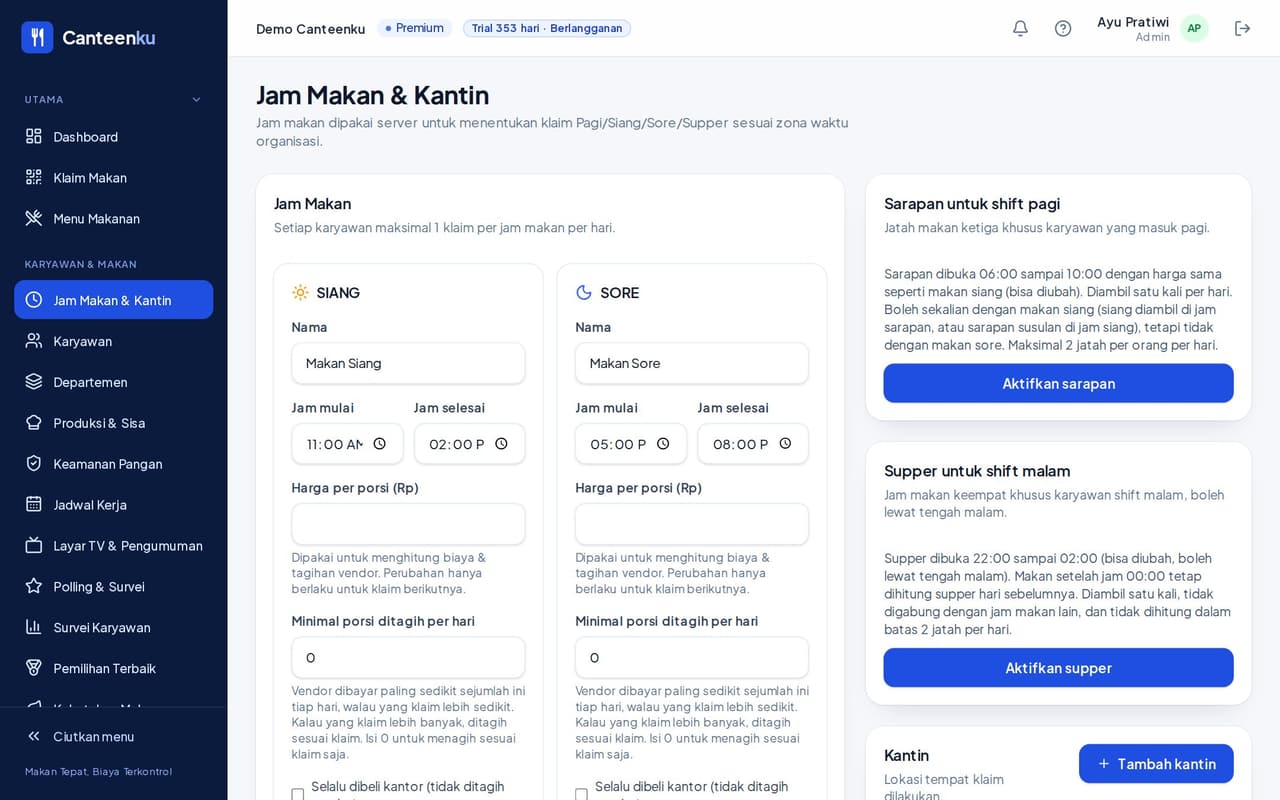
Open Meal Times & Canteens. Each employee gets at most 1 claim per meal time per day. The system uses meal times to decide whether a claim is Lunch or Dinner (and other times if turned on), according to the time zone.
- On the Lunch and Dinner cards, set the Name, Start time, and End time.
- Fill in the Price per portion (Rp). This price is used to calculate cost, vendor bills, and savings.
- Fill in the Minimum portions billed per day if the agreement with the vendor sets one. The minimum is counted from the organisation's first claim.
- Click Add canteen to add a place where claims are made.
Breakfast for the morning shift (06:00 to 10:00, the same price as lunch) and Supper for the night shift (22:00 to 02:00, may run past midnight) can be turned on with the Turn on breakfast and Turn on supper buttons. A meal after 00:00 still counts as the previous day's supper.
Always bought by the office keeps that meal time off the vendor bill, but claims are still recorded and the cost still appears in reports.
Flexible allowance lets employees take their Lunch and Dinner allowance at any meal time (at most 1 Lunch and 1 Dinner per day, never outside meal times).
2Departments and locations
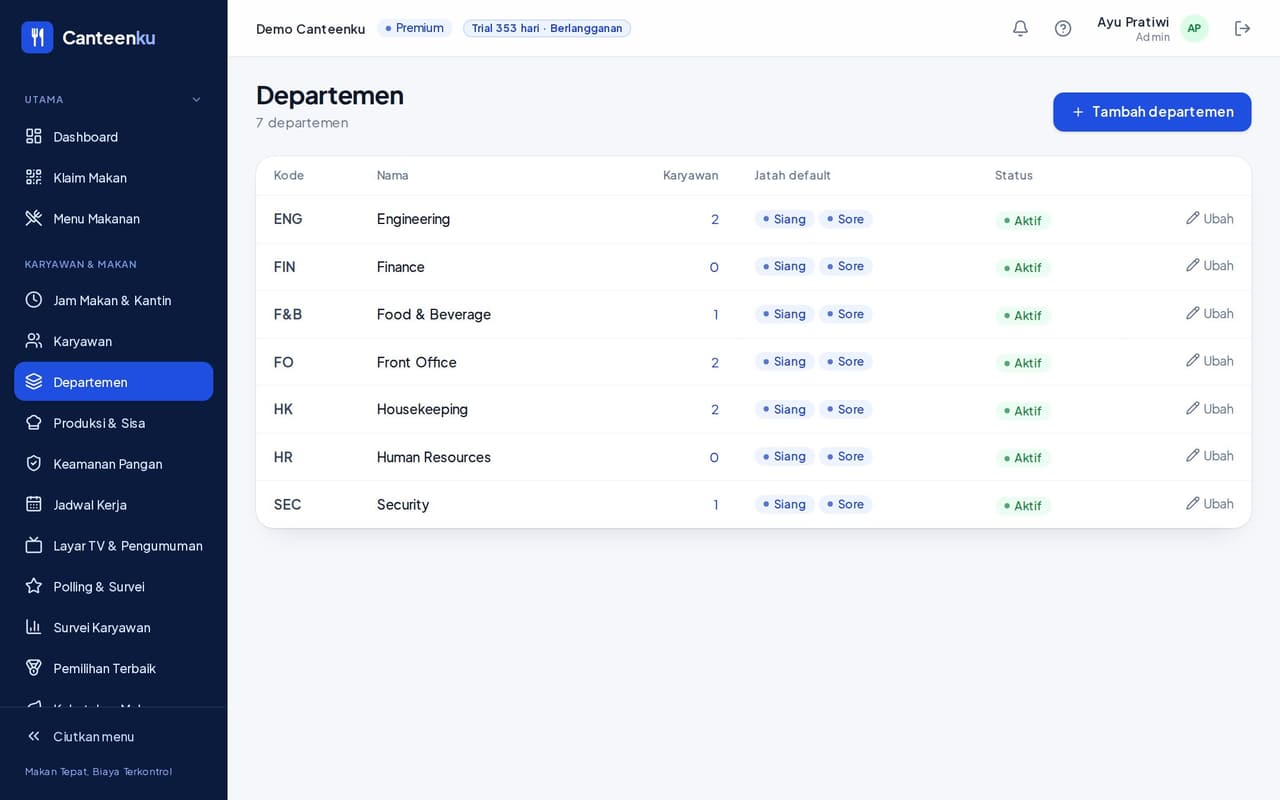
- Departments: click Add department, then fill in the code and name. The table shows the number of employees, the default allowance (Lunch and Dinner), and the status. Use Edit to change one.
- Locations: one organisation can have several hotels, factories, or offices. Click Add location and set its time zone. The number of locations depends on the plan.
3Catering vendors
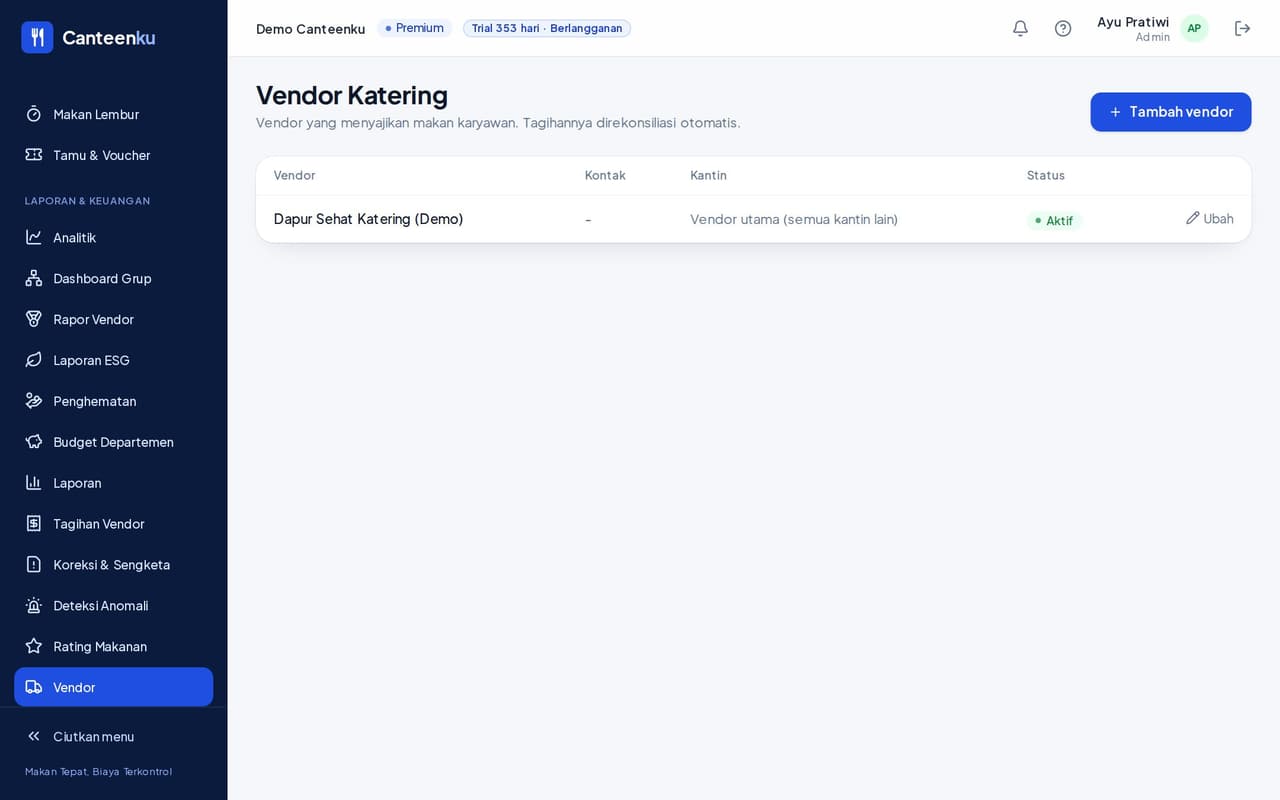
A vendor supplies employee meals. Their bills are calculated and reconciled automatically.
- Open Vendors, then click Add vendor.
- Fill in the name and contact, then choose the canteens they serve. Create the vendor's account under Users & Roles so they can sign in.
Employees and user accounts
Who may eat, and who may sign in as what.
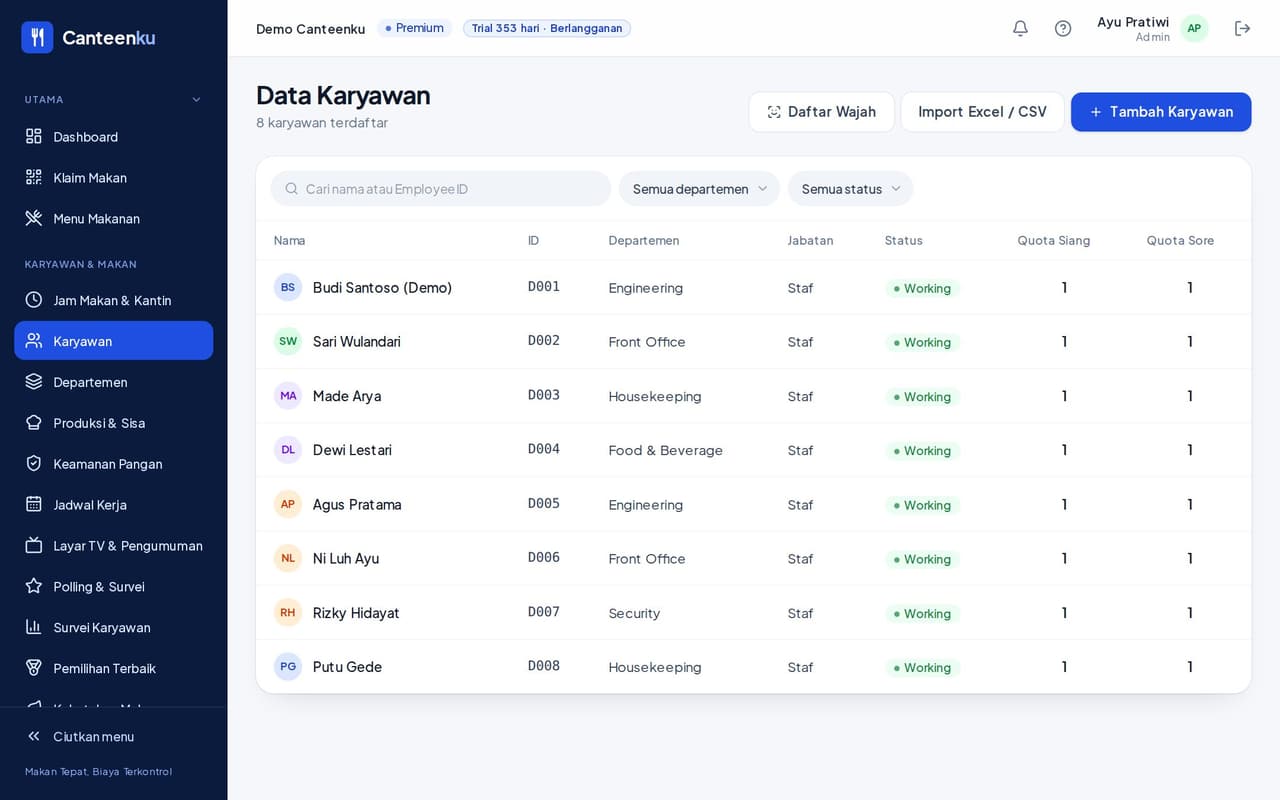
1Employees
Add them one by one, or import from Excel. The full guide is in the HR guide (the Employee data chapter).
- Add Employee: fill in Full Name, Employee ID, Department, Position, Start Date, and Entitled to meals.
- Import Excel / CSV: download the template, fill it in, upload it. Rows with problems are skipped, with the reason.
- Set Inactive or fill in the End Date for employees who leave: claims stop and face data is deleted automatically.
2Users & Roles
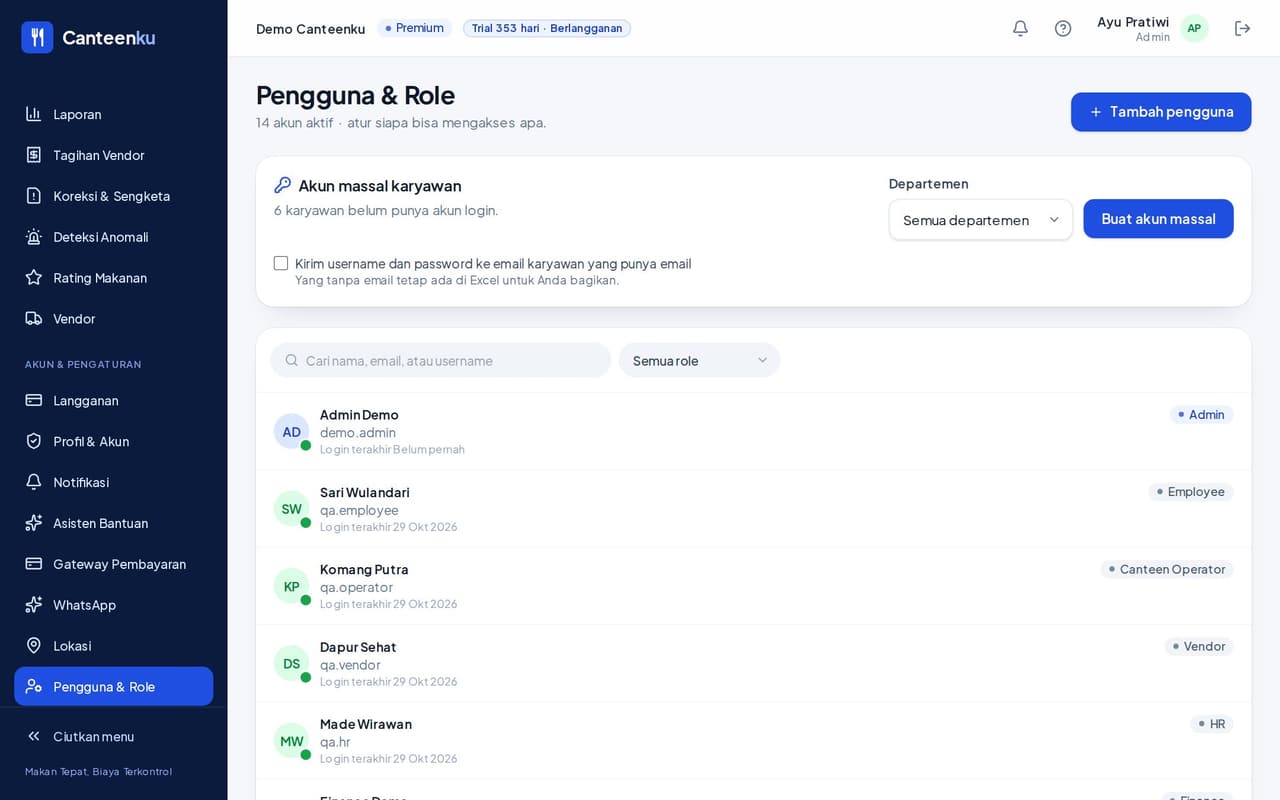
Employees eat with a QR card; sign-in accounts are created here. The roles available are Admin, HR, Finance, Department Head, Canteen Operator, Menu Staff, Vendor, and Employee.
- Open Users & Roles, then click Add user.
- Fill in the full name, then the email or username (or both), and choose the role.
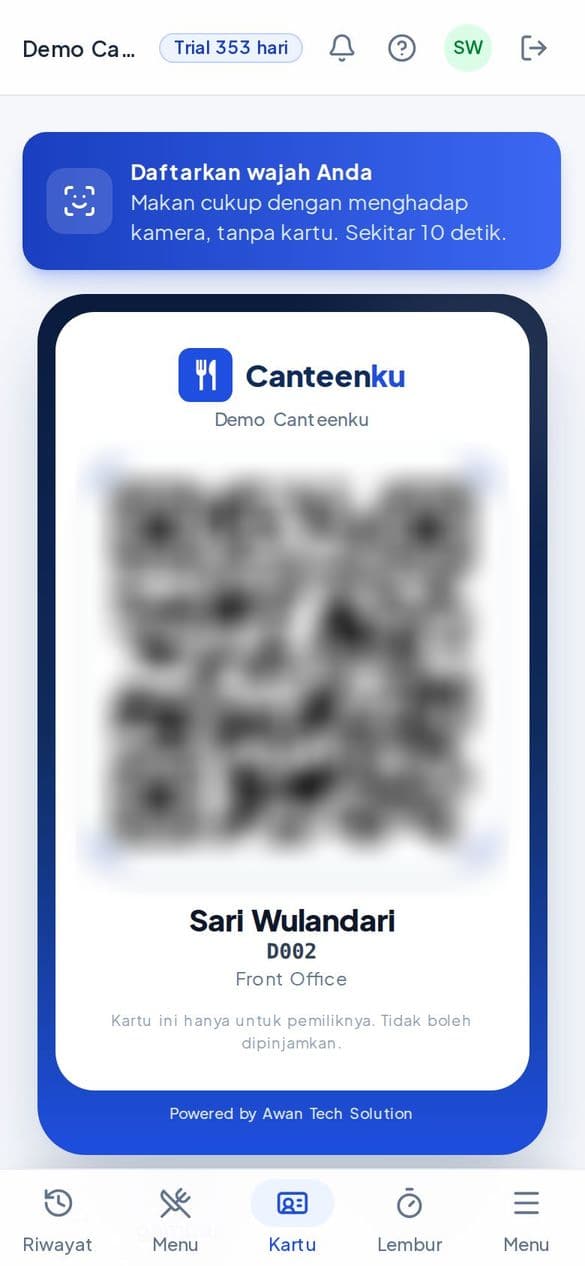
- If this person also eats at the canteen, make them an employee too: they get a QR card, a meal allowance, and the My Card menu, and use one employee slot in the plan. Fill in the Employee code (optional), or choose an existing employee.
- Password: enter one yourself, or leave it empty so a temporary password is generated. The password is shown only once, so download or note it before closing the page.
- Tick Ask to change the password at the first login. Untick it for accounts that keep a fixed password, for example an operator's kiosk phone.
- Bulk employee accounts: choose a department, then create sign-in accounts for many employees at once. Tick Send the username and password to the email of employees who have one, then Download the account list (Excel).
An account without an email cannot use Forgot password. Its password is reset from this page.
If Active account is turned off, the person cannot sign in. You cannot change your own main role or account status.
Menu, production, and food safety
Both the Admin and vendors can fill in the menu.
1The menu
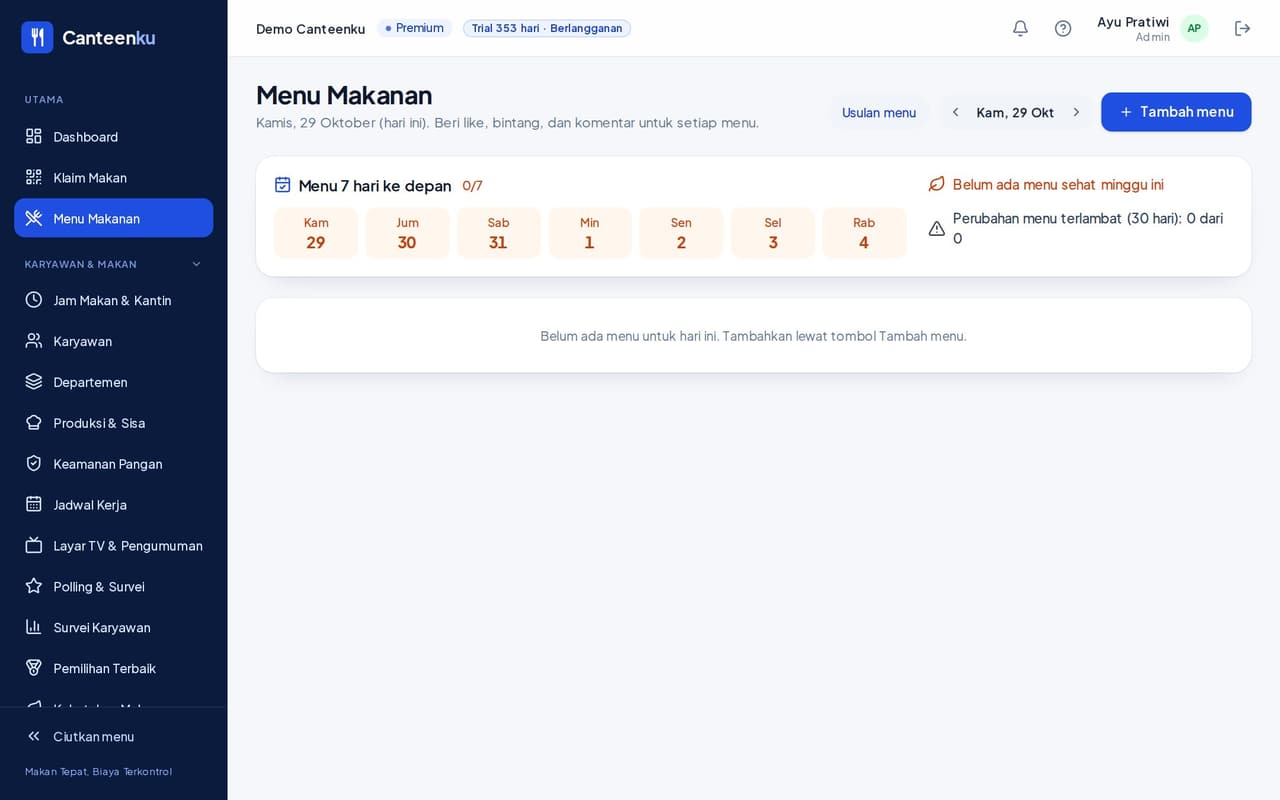
- Open Menu, click Add menu, and fill in the date, meal time, canteen, dish name, note, and photo.
- The Menu for the next 7 days panel shows which days are filled and which are not. The Late menu changes card records changes made close to the day itself.
- Dish suggestions shows food suggestions from employees.
- For a pre-order, mark two or more dishes at the same meal time. Employees choose by the day before at the latest.
2Production & Waste and Food Safety
These two pages are mostly filled in by the vendor, but the Admin can monitor and fill them in. Their contents and use are in the Vendor guide.
Claims at the canteen, guests, and overtime
Scanning, guest vouchers, and extra allowances.
1Meal claims and kiosk mode
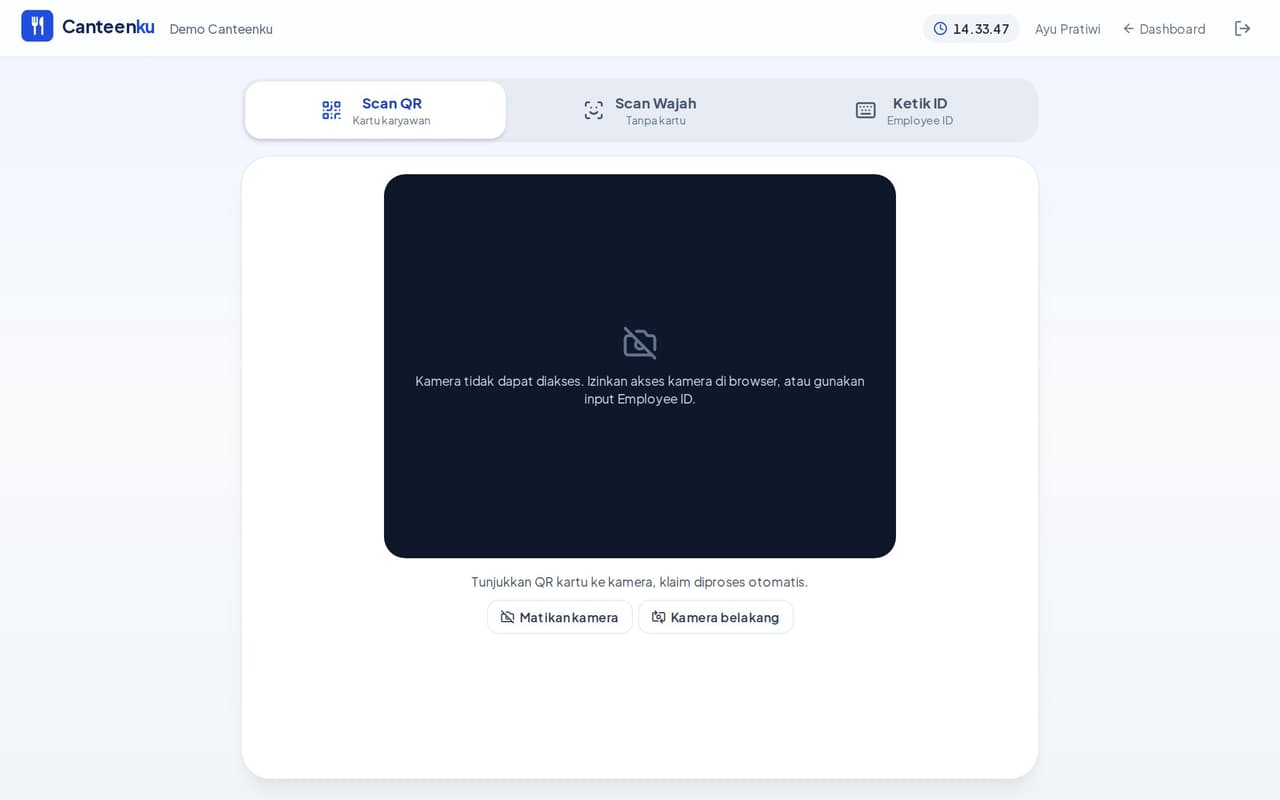
The Admin can also open Meal Claims (the Scan screen) and scan employees. Operators use the same screen. The full guide is in the Canteen Operator guide.
- In the Android app, the Kiosk mode button locks the phone to the Scan screen. To leave, tap the padlock and enter the account password.
- On the Scan screen, the Dashboard icon returns to the Admin dashboard.
2Guests & Vouchers and overtime meals
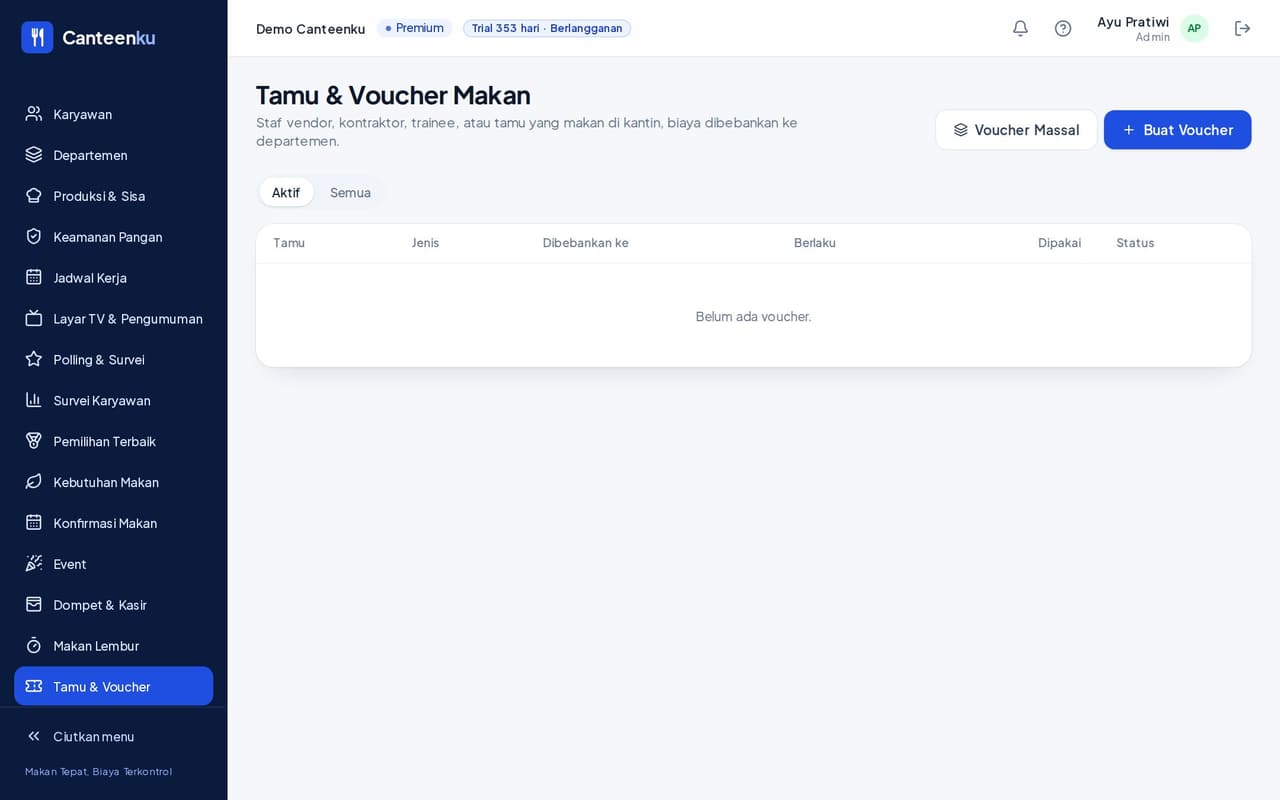
- Guests & Vouchers: click Create Voucher for one guest or Bulk Vouchers for many. The cost is charged to a department (cost centre) with a PIC in charge.
- Overtime Meals: approve employee requests, or grant an allowance directly. The cost goes to the employee's department.
Communication and employee engagement
Announcements, polls, surveys, and elections.
1Announcements, polls, surveys, and elections
All of these menus are the same as HR's. The full steps are in the HR guide. In short:
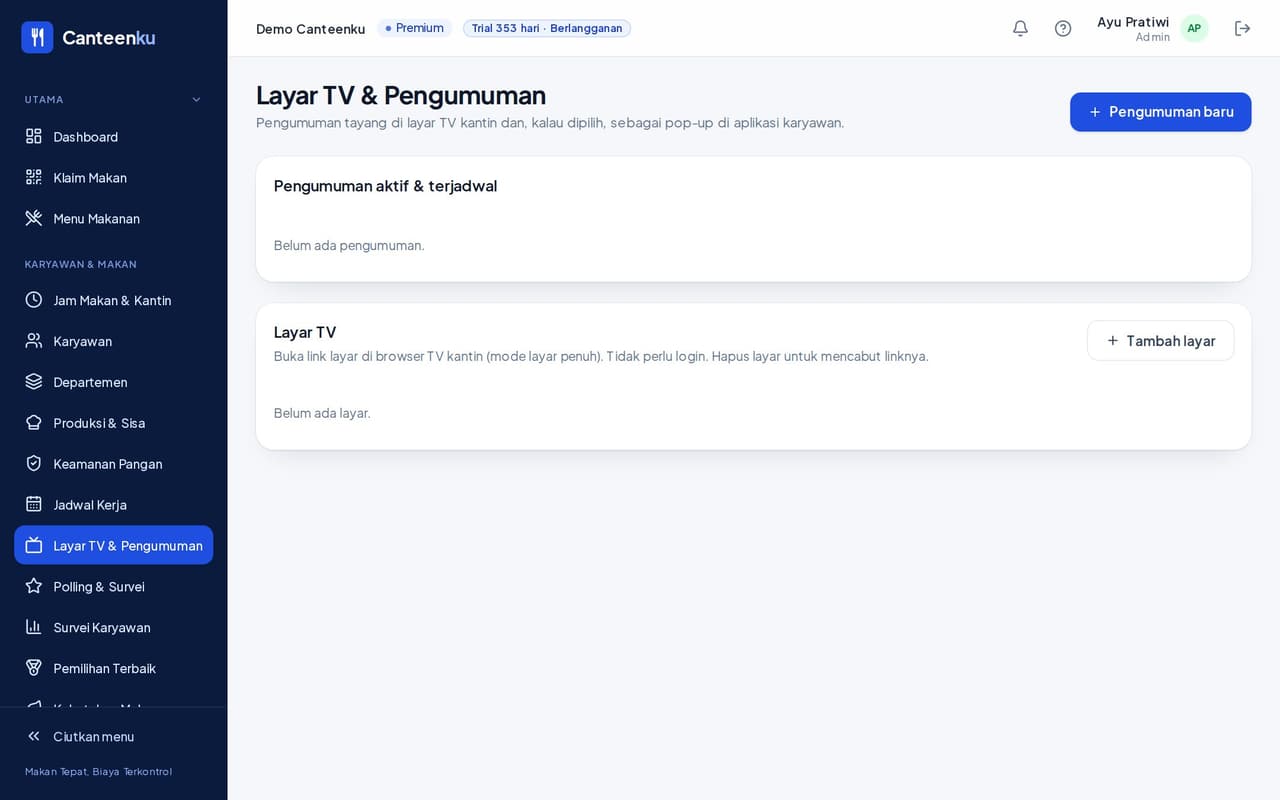
- TV Screens & Notices: announcements on the canteen TV and as pop-ups in the app, plus TV screen links that need no sign-in.
- Polls & Surveys: quick questions through a pop-up, with anonymous answers.
- Employee Surveys: surveys in sections, with anonymous answers; only the combined results are visible.
- Best of the Month: vote for the best colleague in each category.
- Meal Confirmation: ask employees whether they will eat at the canteen tomorrow.
Reports and control
Costs, bills, corrections, and the audit trail.
1The dashboard and reports
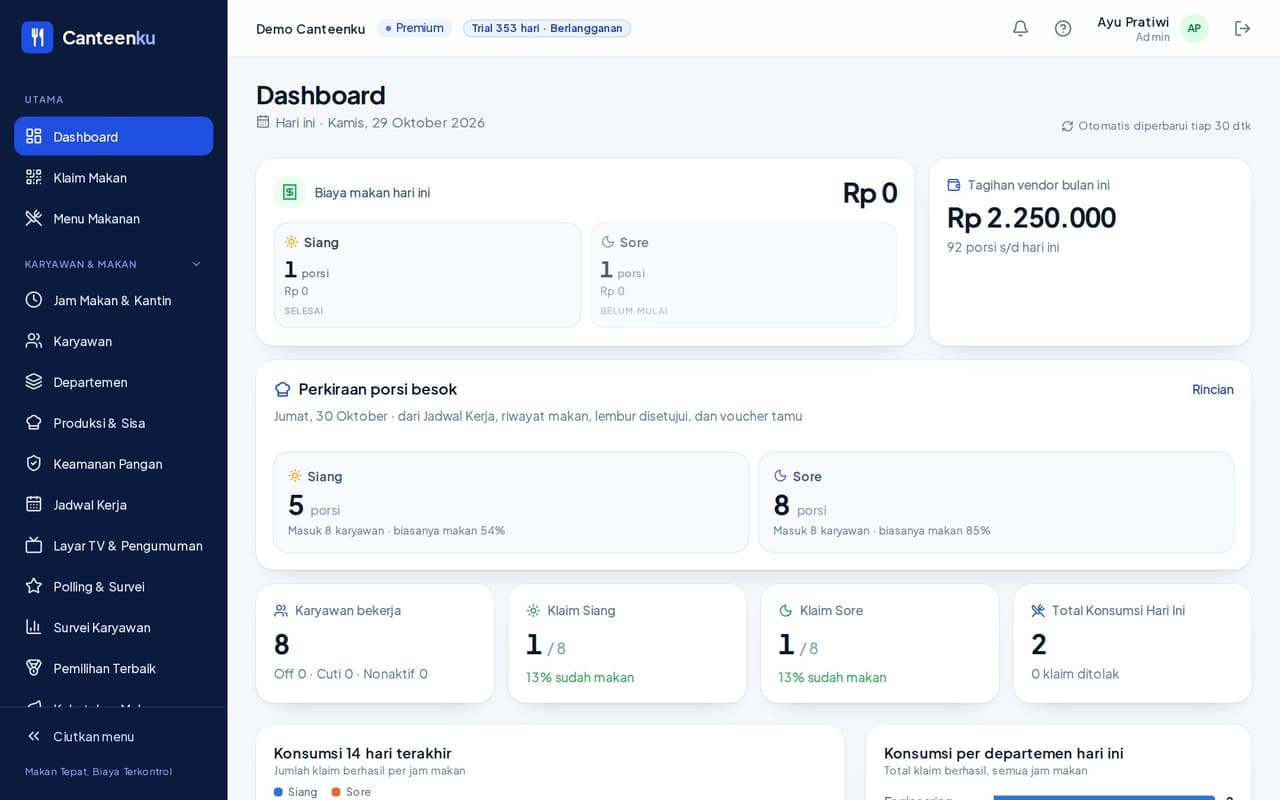
- Dashboard: today's meal cost, this month's vendor bill, tomorrow's portion forecast, employees working, Lunch and Dinner claims, a 14-day chart, and the latest claims.
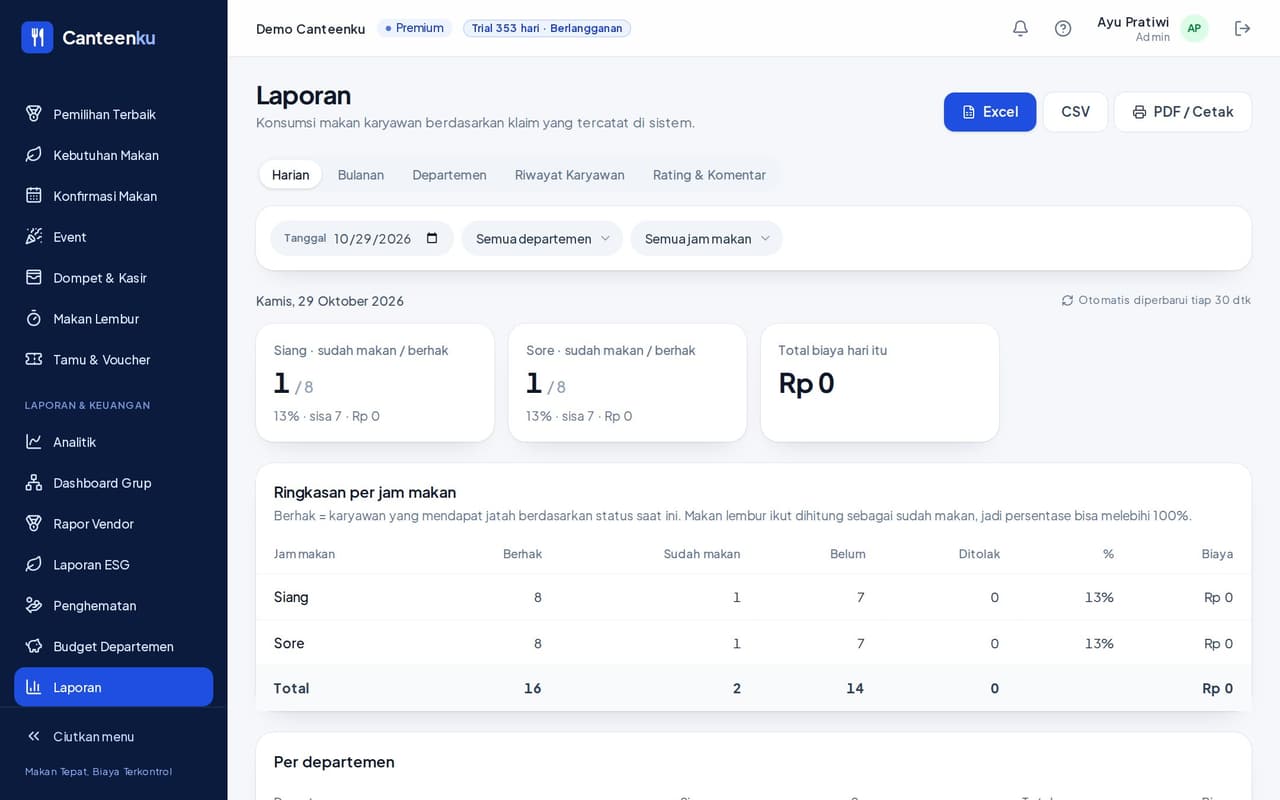
- Reports: the Daily, Monthly, Department, Employee History, and Ratings & Comments tabs. Download with Excel, CSV, or PDF / Print.
- Analytics, the Group Dashboard, Savings, and Department Budgets: they are explained in the Finance guide.
2Vendor bills, corrections, anomalies
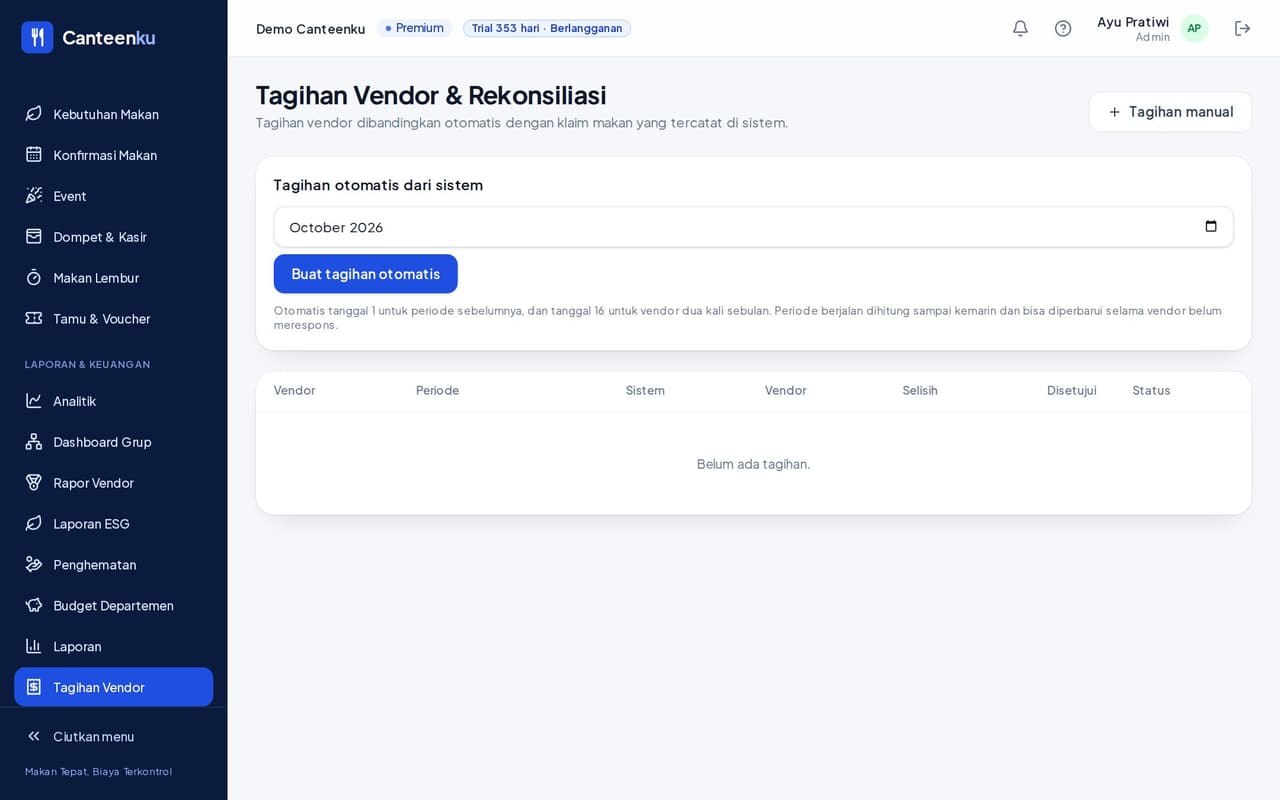
- Vendor Bills: compared automatically with claims. Approve per system data or per vendor bill, or return it for revision.
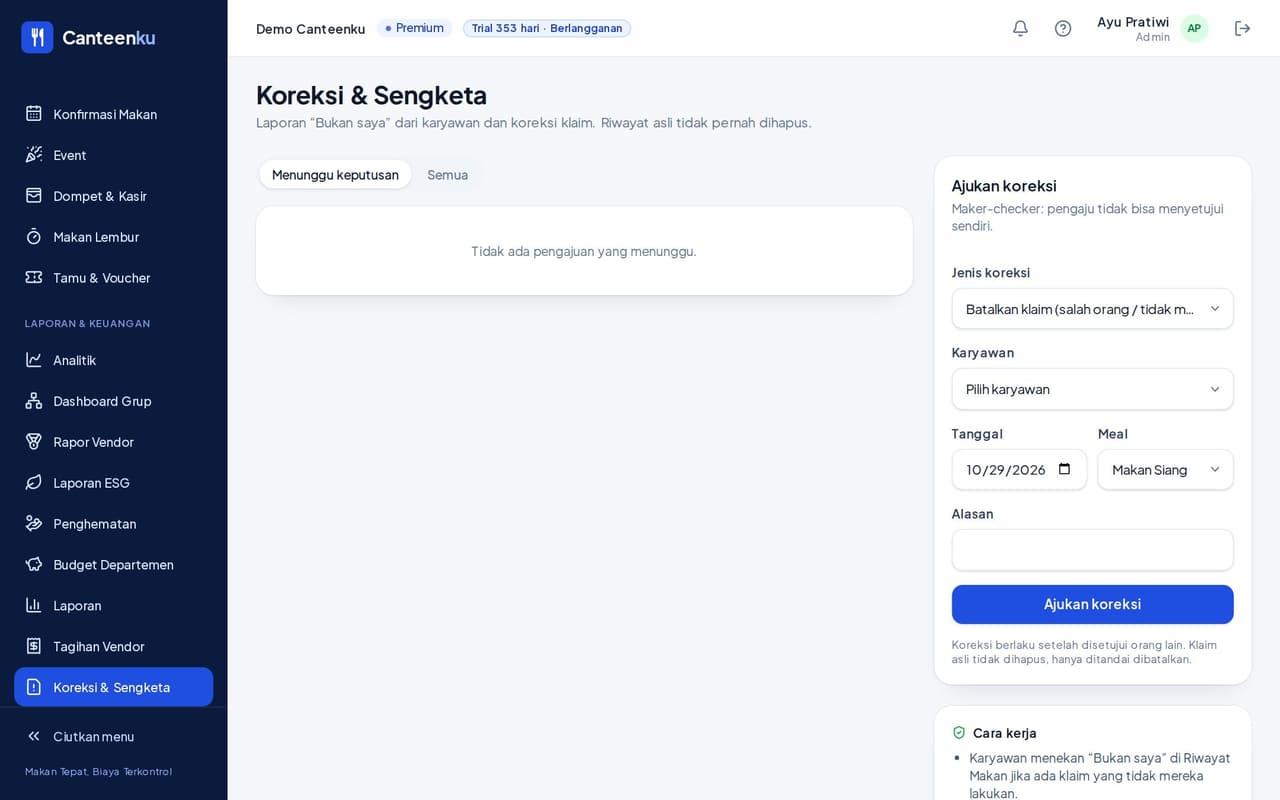
- Corrections & Disputes: Not me reports from employees and claim corrections. The original history is never deleted. Two-person submission is available on the Premium plan.
- Anomaly Detection: unusual claim patterns (Pro and Premium plans). Only a starting point for review, not an accusation.
- Audit Log: all important activity is recorded permanently and can be exported as CSV.
Subscription, payments, and WhatsApp
The Canteenku plan, receiving payments, and notifications.
1Subscription
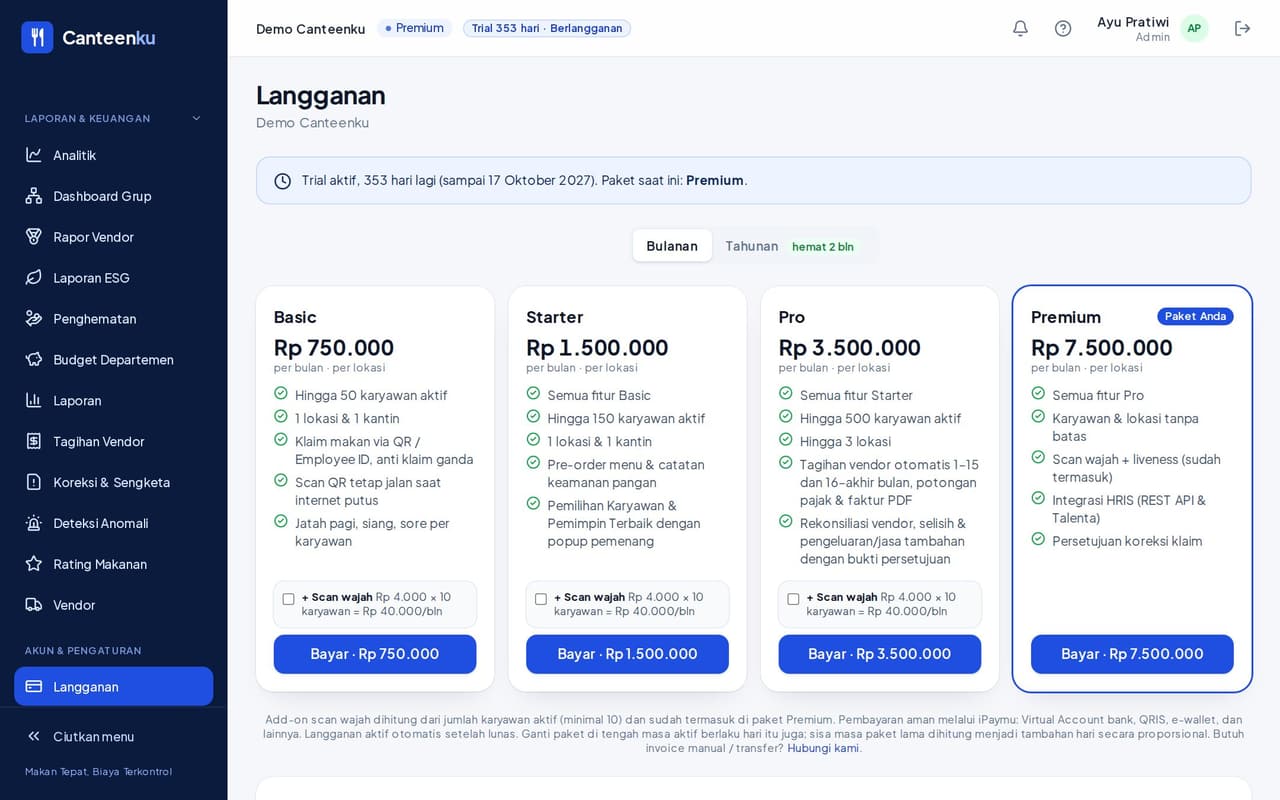
- Open Subscription at canteenku.cloud in a browser (payment is not made through the Android app).
- Choose Monthly or Yearly and a plan: Basic, Starter, Pro, or Premium. Your plan is marked.
- Click Pay. Payment goes through iPaymu: bank Virtual Account, QRIS, e-wallets, and more. The subscription activates automatically once paid.
- Changing plan in the middle of a period takes effect that day, and the remaining time on the old plan is converted into extra days proportionally.
The face scan add-on is calculated from the number of active employees (minimum 10) and is already included in the Premium plan. Need a manual invoice or a bank transfer? Contact us.
2Payment Gateway (employee wallet)
Connect an iPaymu account that belongs to your organisation so payments from the employee wallet go into your own iPaymu balance.
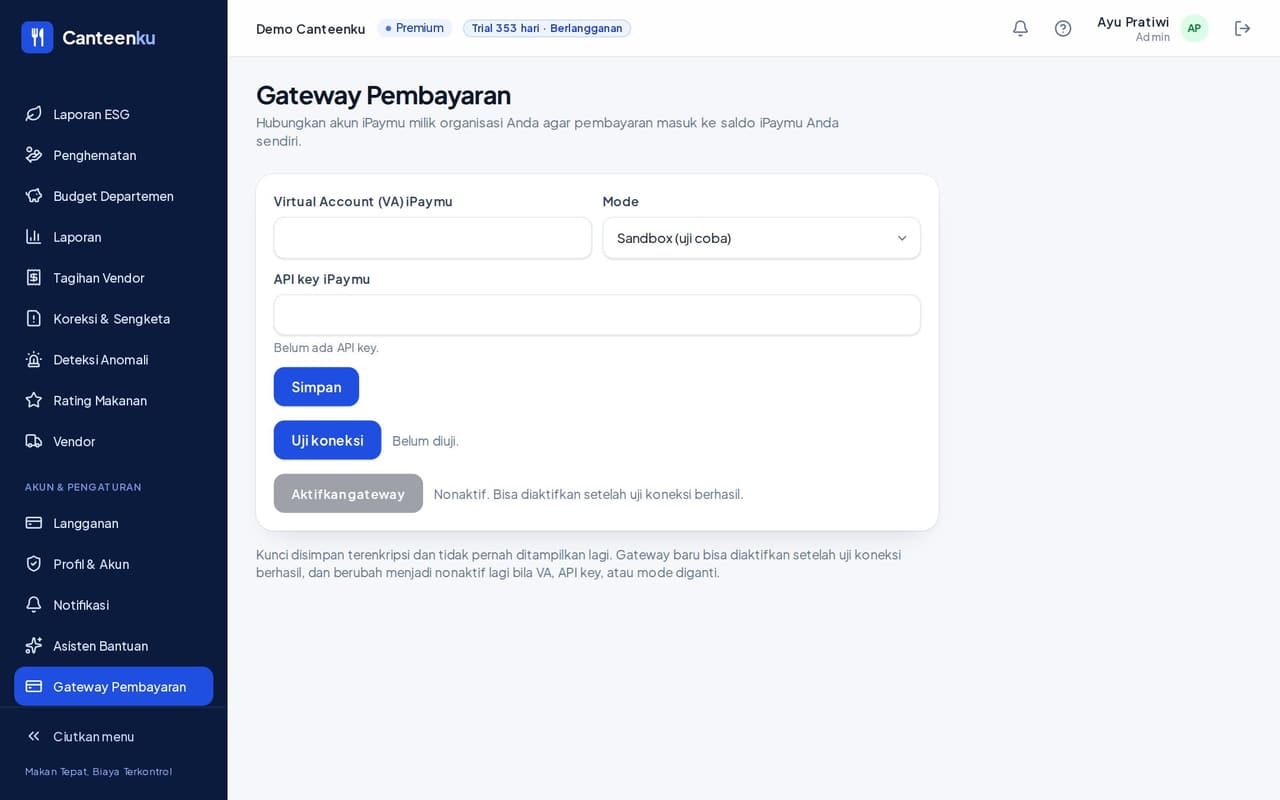
- Open Payment Gateway, then fill in the iPaymu Virtual Account (VA) and the iPaymu API key.
- Choose the Mode: Sandbox (test) to try it out, or production for real money.
- Click Save, then Test connection. If it succeeds, turn the gateway on.
The keys are stored encrypted and never shown again. A new gateway can only be turned on after a successful connection test, and it turns off if the VA or API key is changed.
3WhatsApp
Choose who receives automatic notifications from Canteenku through official WhatsApp.
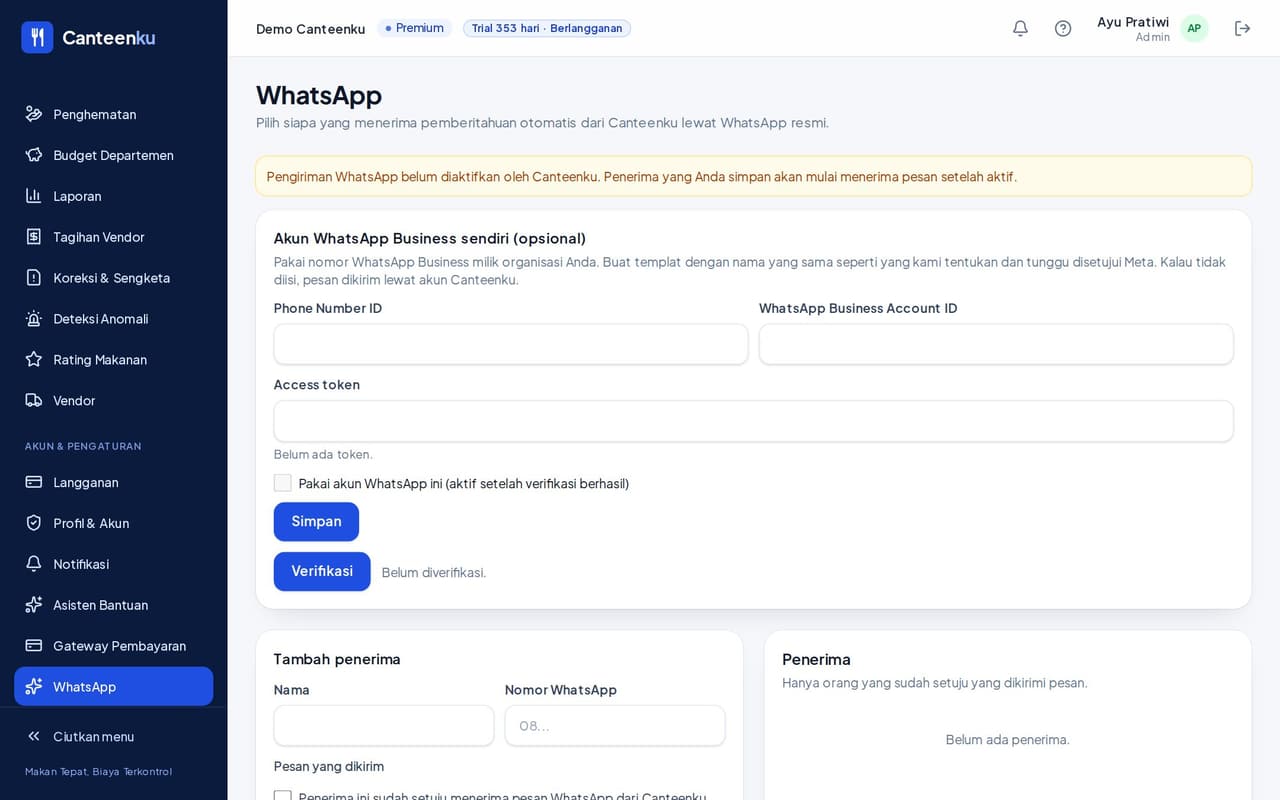
- Open WhatsApp. You can use your own WhatsApp Business account (optional): fill in the Phone Number ID, WhatsApp Business Account ID, and Access token, then Save and Verify.
- Under Add recipient, fill in the name and WhatsApp number, then choose which messages are sent. The Recipients list appears beside it.
WhatsApp sending becomes active once Canteenku turns it on. Until then, the recipients you save only start receiving messages after it is activated.
Frequently asked questions
Short answers to the most common problems.
- An employee cannot claim even though they are working.
- Check in order: the Status is active and Entitled to meals is ticked under Employees, the meal time is open under Meal Times & Canteens, and the Duty Roster does not mark a day off. If the organisation requires a roster (Schedule required), make sure the roster is filled in.
- How do I deactivate an account for someone who left?
- Change the employee's status to Inactive (face data is deleted automatically), then turn off Active account under Users & Roles so they cannot sign in.
- I forgot my password, or the account has no email.
- Accounts with an email use Forgot password?. Accounts without an email are reset by the Admin under Users & Roles.
- This month's vendor bill has a value even though there are no claims.
- The minimum portions per day are counted from the organisation's first claim. The number of billed portions is written beneath the bill figure on the dashboard.
- An announcement does not show in the employee app.
- Make sure the dates are valid and the pop-up or notification option is ticked. Employees need to turn on notifications under Notifications on their device.
- Can other customers' data be seen?
- No. Every organisation is separated at the database level, and you only see your own organisation's data.
Still have questions?
Contact us on WhatsApp +62 857-0779-9569 or by email at awantechsolution.bali@gmail.com. Tell us your role and the name of the menu you opened.